Results 1 to 8 of 8

Thread: DIY - Looking good for the long haul! (Rust protection for the rear hatch)

  1. #1
    Member
    Join Date
    Jul 2014
    Location
    Colton, NY
    Country
    United States
    Posts
    39
    Garage empty: add car
    Thanks
    5
    Thanked 38 Times in 14 Posts

    DIY - Looking good for the long haul! (Rust protection for the rear hatch)

    --------------------
    Admin note
    -- this thread is part of a DIY series:

    1. DIY - Rust protection front/rear wheel well areas
    2. DIY - Rust protection for the rear hatch
    3. DIY - Rust protection front/rear doors
    4. DIY - Rust protection for the inner rear quarters


    --------------------

    Welcome back to Part V of the DIY - Looking good for the long haul!
    (Rust protection for the rear hatch.)

    Recap:

    In Parts I & II we undercoated the front and rear wheel well areas and went the extra mile by painting the front calipers and the rear drums to give it a better shot at looking good years from now.

    In Parts III & IV we undercoated the front and rear inner doors to give them some extra protection in an area that generally receives very little attention.

    In Part V, the rear hatch is in the spotlight.

    -----------------------
    ***DISCLAIMER***
    -----------------------
    What follows is the removal of the rear hatch trim pad to gain access to the inner cavity. The procedures for this task will be general and probably not all-inclusive so if unsure about anything, ask questions or do a little research before you start. In the same way there are those who should never carry anything sharper than fresh marshmallow Peeps, there are those that should never attempt to hands-on repair an automobile. Going one step further, please consider this writeup for entertainment purposes only - I assume no liability - CrazyJerry

    Onward to the rear hatch!

    ------------------------------------------------------------------------------
    2,640 miles - the newness remains - and each tank continues to average 51mpg!
    ------------------------------------------------------------------------------
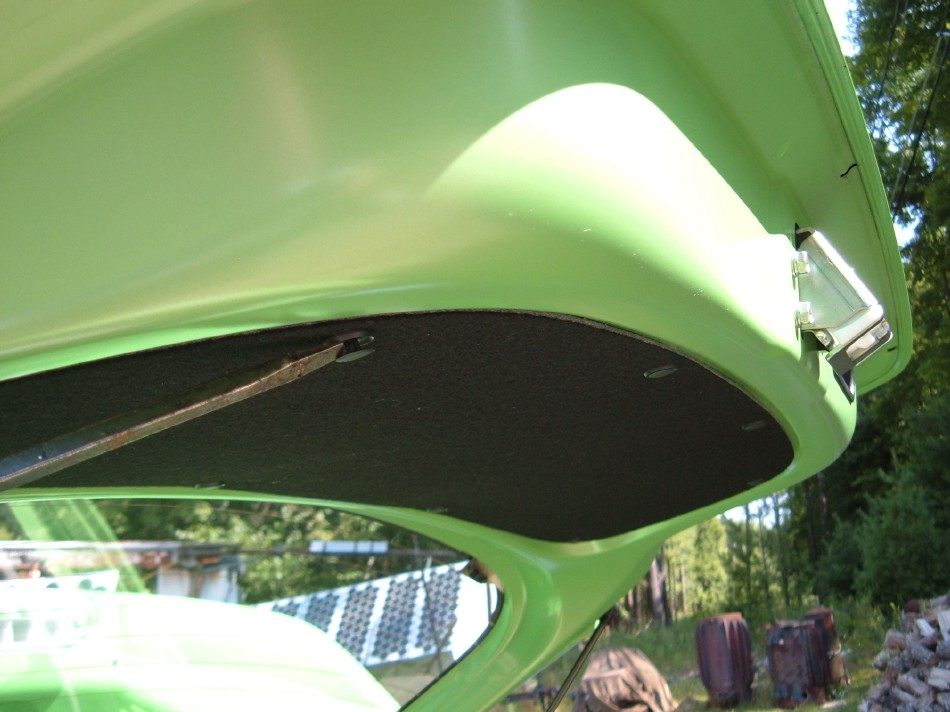
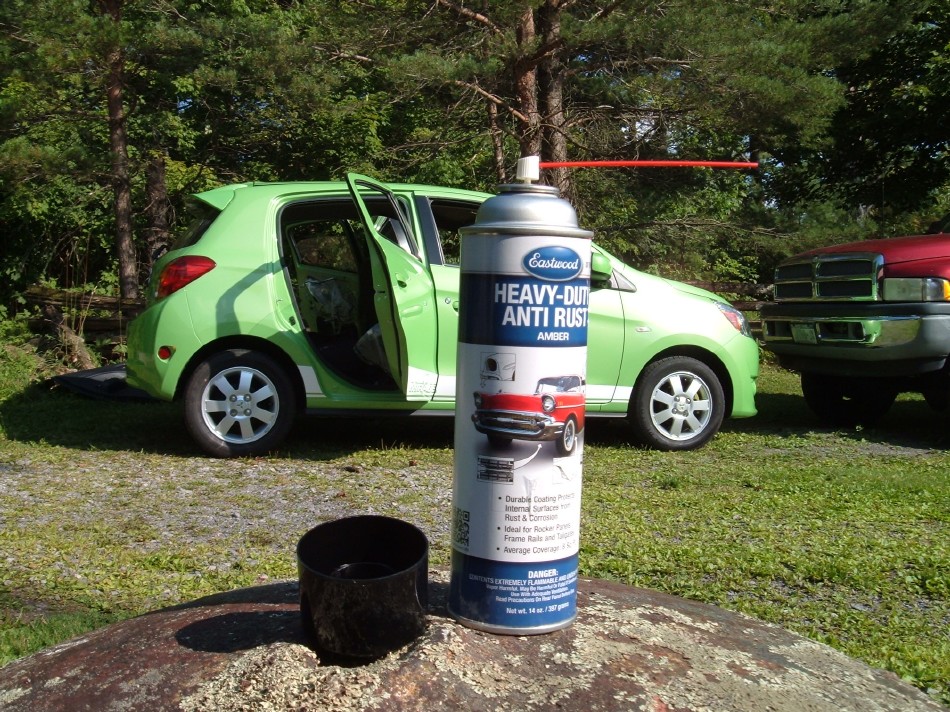
    Undercoating the "inners" of the rear hatch requires the small rectangular trim pad to be removed and this is not a difficult task.

    For the removal, we'll need a thin regular flat-tip screwdriver and about 2.5 minutes...

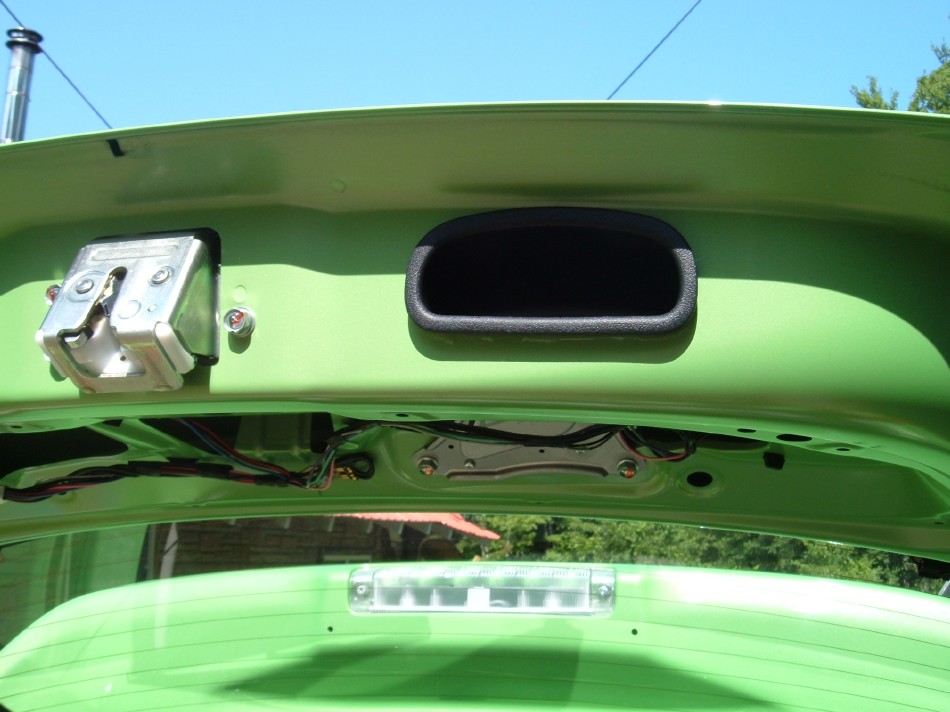
    Step 1: Open the rear hatch and take a look at the inner trim pad. Notice the plastic push rivets that hold it in place. Using your flat tip screwdriver and a little finesse, pry the heads up about a quarter of an inch:
    .

    .

    .
    .
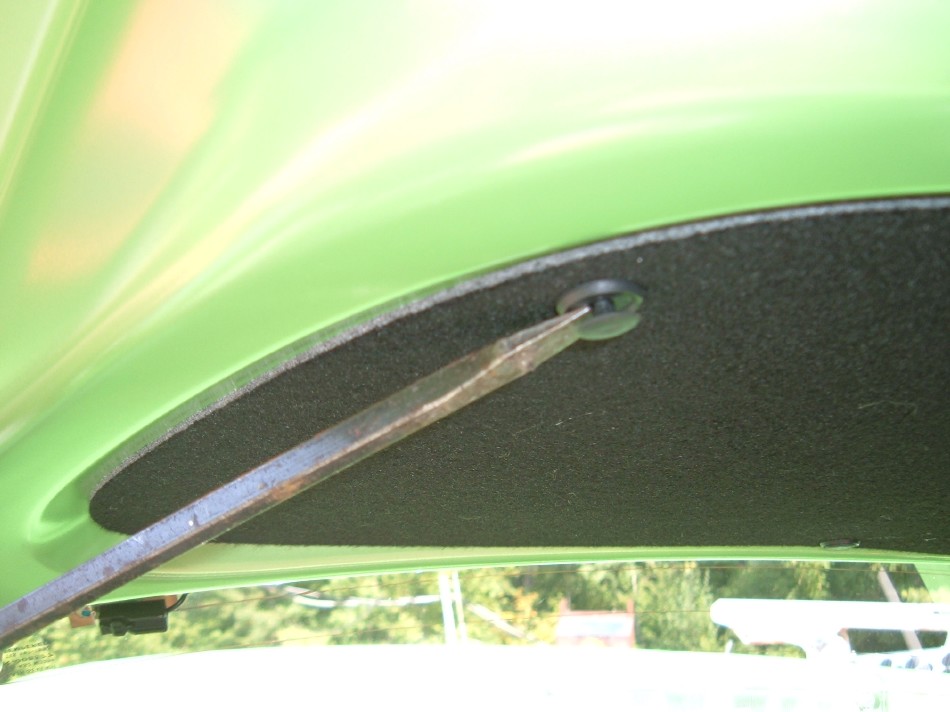
    As you work your way around the trim pad, you'll notice how easily the trim pad will start to fall away from the hatch:
    .

    .
    .
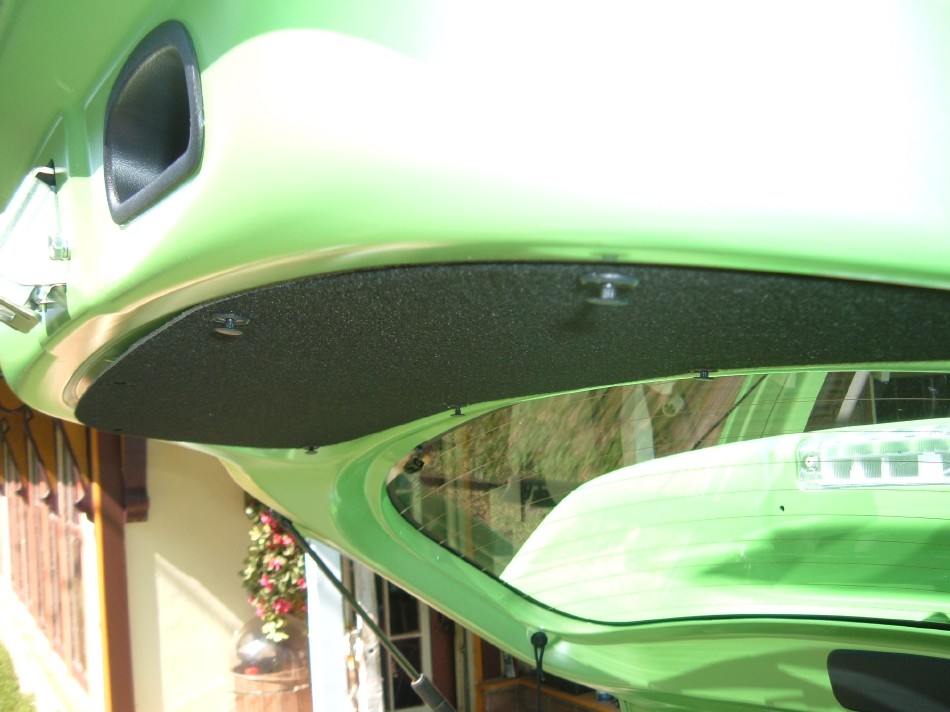
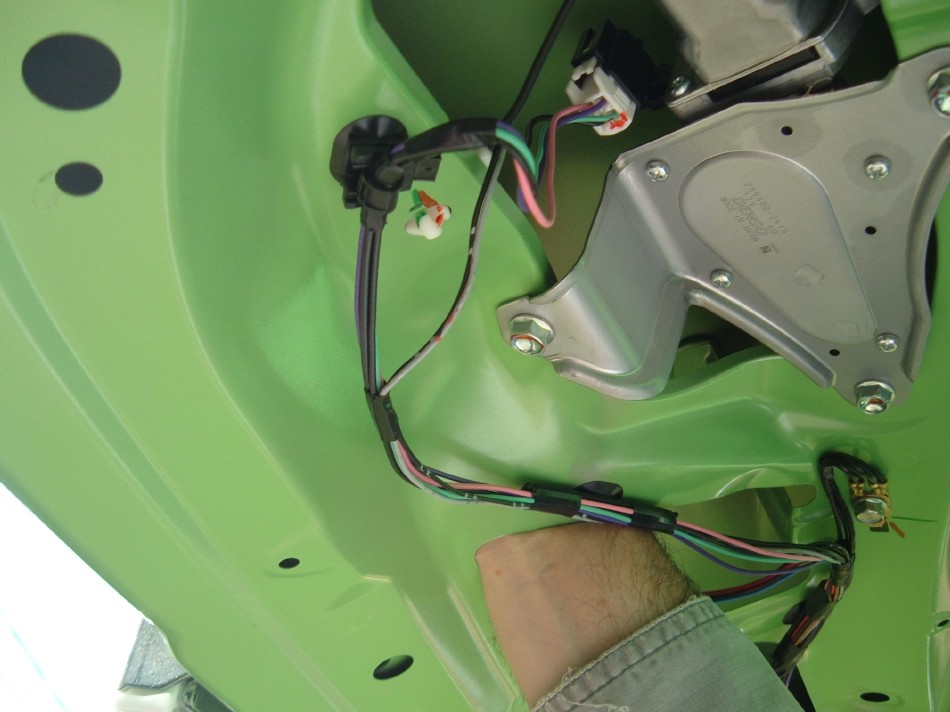
    Looking at the uncovered area you'll see plenty of cutouts that make access to the inners very handy:

    .

    .
    .
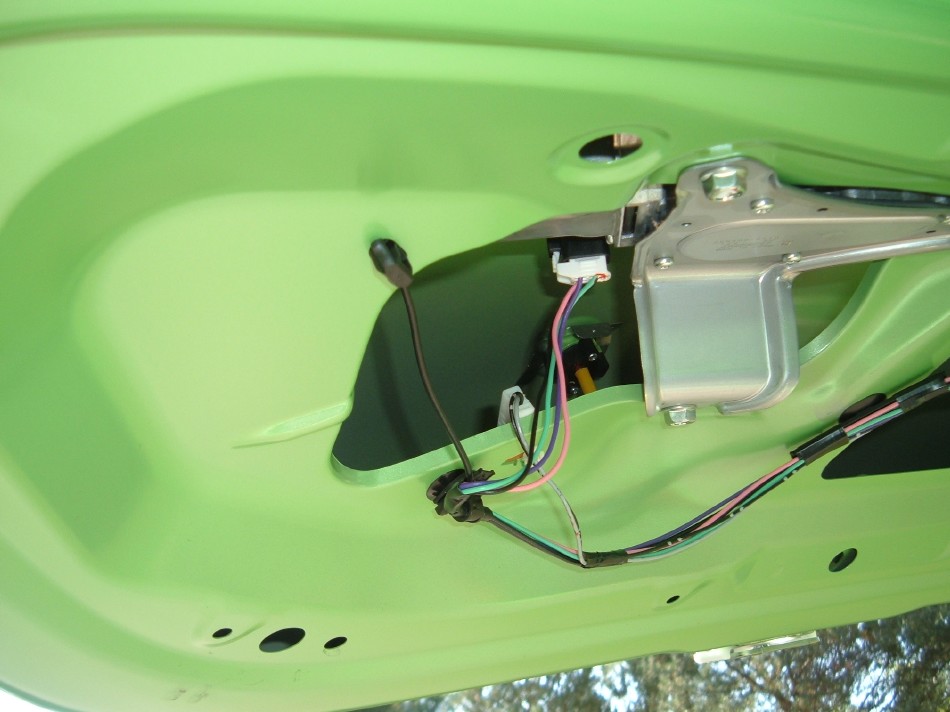
    And, if you are able to snake your hand up through one of those places you'll be able to pop out the rear hatch close pull and provide another path to spray the inner hatch area:
    .

    .

    .

    .
    .
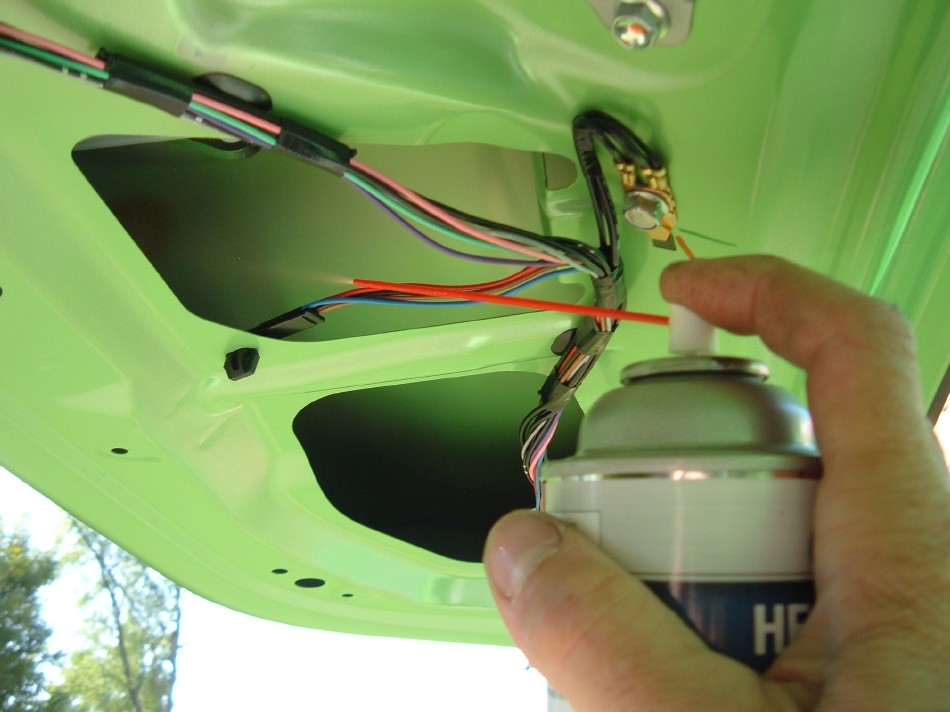
    As previously used, the amber rattle can undercoating can be sprayed in the cavity:
    .

    .

    .
    .
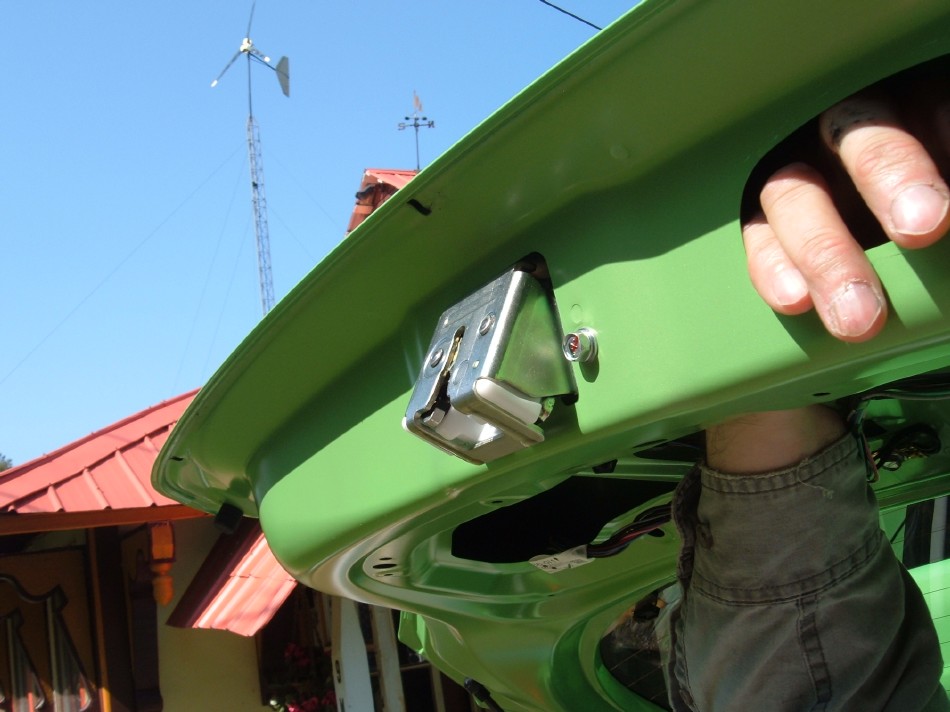
    While spraying, be sure to blast the rear hatch lock hold down clip:
    .

    .
    .
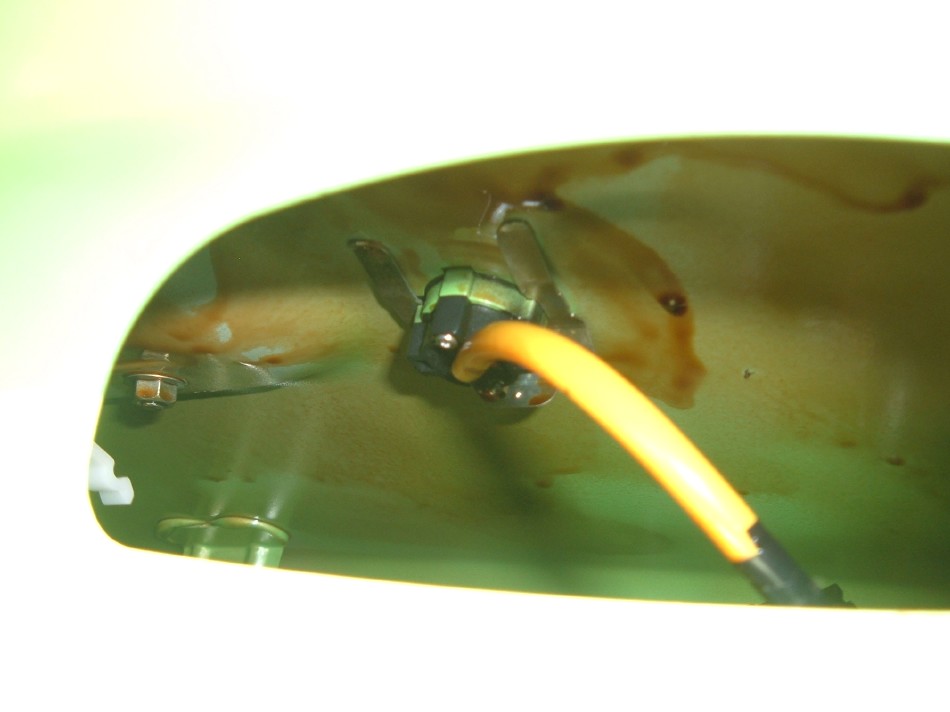
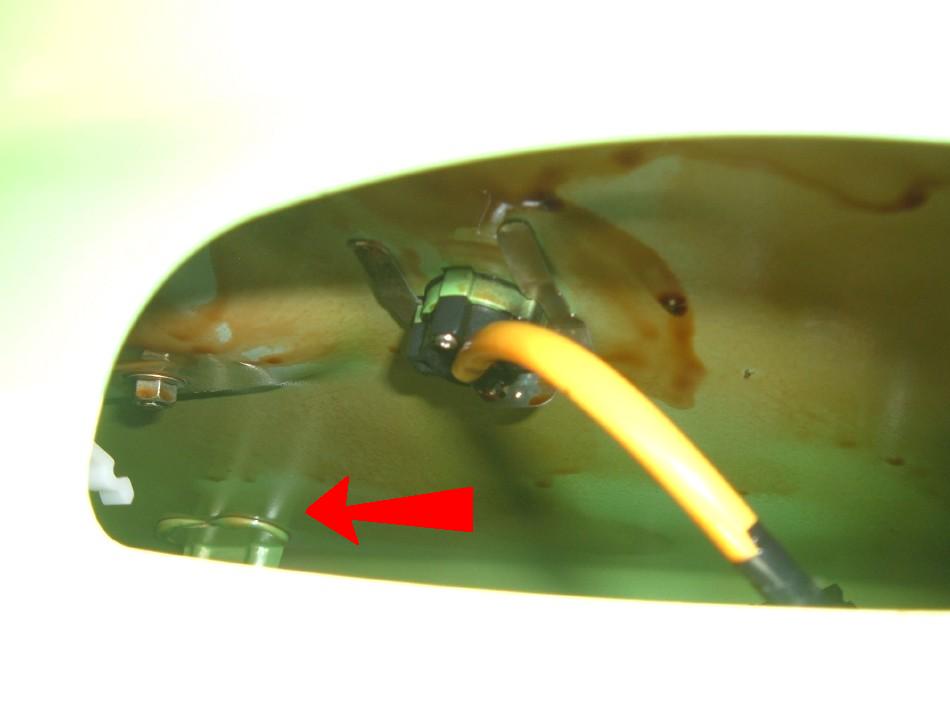
    ***NOTE*** Throughout this series (DIY - Looking good for the long haul!) there is a reoccurring theme that needs to be commended. It is the presence of seam sealer and it shows up in places where one might not even expect it to be. This latest example from the inner hatch photo below resides southwest of the lock clip and points out a connection between a brace and the outer shell:
    .

    .
    .
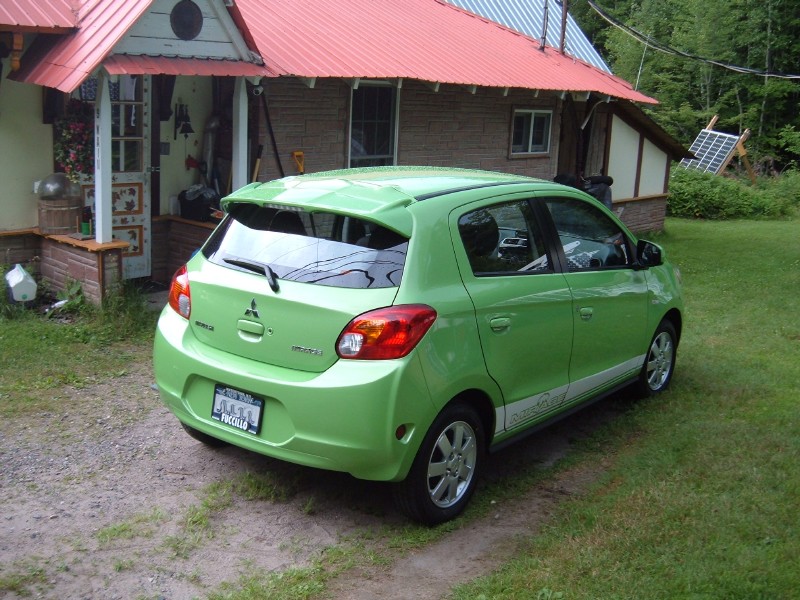
    When you're done spraying, simply put the rear hatch trim pad back in place and insert the plastic rivets in their holes and push their heads flush to the pad. If you see any areas where the undercoat dripped out, you may wish to wipe with a paper towel. The rear hatch is now happy and so is the Mirage's owner:
    .
    .

    .
    .
    ~CrazyJerry

    P.S. Still aspiring to obtain a free window forum sticker!


    Last edited by CrazyJerry; 01-21-2019 at 10:26 PM. Reason: Formatting

  2. The Following 5 Users Say Thank You to CrazyJerry For This Useful Post:

    Back-space (08-30-2014),beerbelly58 (09-25-2014),Daox (09-02-2014),MetroMPG (09-25-2014),ToXiQ (10-18-2014)

  3. #2
    Junior Member Morin's Avatar
    Join Date
    Jul 2014
    Location
    Quebec
    Country
    Canada
    Posts
    18
    Thanks
    0
    Thanked 3 Times in 2 Posts
    Next will be front and rear fender and the hood?

  4. #3
    Member
    Join Date
    Jul 2014
    Location
    Nova Scotia
    Country
    Canada
    Posts
    75
    Thanks
    10
    Thanked 5 Times in 3 Posts
    Admiring the windmill and solar panels Think you could DIY one of those panels to the roof of your car? Lol

        __________________________________________

        click to view fuel log View my fuel log 2014 Mirage SE 1.2 manual: 52.3 mpg (US) ... 22.2 km/L ... 4.5 L/100 km ... 62.8 mpg (Imp)


  5. #4
    Member
    Join Date
    Jul 2014
    Location
    Colton, NY
    Country
    United States
    Posts
    39
    Garage empty: add car
    Thanks
    5
    Thanked 38 Times in 14 Posts
    Quote Originally Posted by Morin View Post
    Next will be front and rear fender and the hood?
    I sure hope so Morin. Winter is going to be closing in soon so I might need to kickstart a little sooner!
    ~CrazyJerry

  6. #5
    Member
    Join Date
    Jul 2014
    Location
    Colton, NY
    Country
    United States
    Posts
    39
    Garage empty: add car
    Thanks
    5
    Thanked 38 Times in 14 Posts
    Quote Originally Posted by Back-space View Post
    Admiring the windmill and solar panels Think you could DIY one of those panels to the roof of your car? Lol
    Haha! Wouldn't I like to! It's really-really the ultimate in self-control for me to drive this car everyday and not attack it with a sawzall or something! It's not that I hate it, but rather believe it soooo much more capable than in stock form.

    Have a good day and thanks for checking this thread out!

    ~CrazyJerry

  7. #6
    Senior Member fifteenwindow's Avatar
    Join Date
    Oct 2013
    Location
    Oshkosh, WI
    Country
    United States
    Posts
    223
    Thanks
    159
    Thanked 92 Times in 63 Posts
    Quote Originally Posted by CrazyJerry View Post
    It's really-really the ultimate in self-control for me to drive this car everyday and not attack it with a sawzall or something! It's not that I hate it, but rather believe it soooo much more capable than in stock form.
    Hey there, Jerry. What would you modify? I'm looking for inexpensive mods that improve MPGs.

    I'm enjoying your DIY series. Thanks

        __________________________________________

        click to view fuel log View my fuel log 2014 Mirage DE 1.2 manual: 53.1 mpg (US) ... 22.6 km/L ... 4.4 L/100 km ... 63.8 mpg (Imp)


  8. #7
    Member
    Join Date
    Jul 2014
    Location
    Nova Scotia
    Country
    Canada
    Posts
    75
    Thanks
    10
    Thanked 5 Times in 3 Posts
    That's what I'm looking for, too. Cheap ways to get miles, and maybe add a little power in case I ever need it. Getting an air pump in a few days, I've already dropped just shy of 50 lbs out of her and hoping to lose a few more. Looking at better plugs, air filters, etc for later tune ups Thanks for making the threads, Jerry! Keep em coming

        __________________________________________

        click to view fuel log View my fuel log 2014 Mirage SE 1.2 manual: 52.3 mpg (US) ... 22.2 km/L ... 4.5 L/100 km ... 62.8 mpg (Imp)


  9. #8
    Member
    Join Date
    Jul 2014
    Location
    Colton, NY
    Country
    United States
    Posts
    39
    Garage empty: add car
    Thanks
    5
    Thanked 38 Times in 14 Posts
    Quote Originally Posted by fifteenwindow View Post
    Hey there, Jerry. What would you modify? I'm looking for inexpensive mods that improve MPGs.

    I'm enjoying your DIY series. Thanks
    Quote Originally Posted by Back-space View Post
    That's what I'm looking for, too. Cheap ways to get miles, and maybe add a little power in case I ever need it. Getting an air pump in a few days, I've already dropped just shy of 50 lbs out of her and hoping to lose a few more. Looking at better plugs, air filters, etc for later tune ups Thanks for making the threads, Jerry! Keep em coming
    Hi Folks!
    Sorry for the extended outage with postings. Sometimes I get caught up in a project and the rest of life builds up a huge backlog!

    MetroMPG has mentioned quite a few diy items for upping fuel economy with the Mirage. He's right on with those as they've been thoroughly tested on many makes of cars with positive results. He started an excellent thread here:
    http://mirageforum.com/forum/showthr...-with-options)

    The CrazyJerry twist would love to attack this thing with a sawzall and a mig welder. Looks aside, I would love to move the windshield forward - so much so that it would more or less be a continuation of the curvature at the top/front of the hood. Then I'd extend the roofline to meet the new position of the windshield. Access to the engine would ultimately be via an entire front fender/windshield canopy tilt front-end. (The rear gasket of this would be around where the previous top of the windshield was.) The idea also preserves the original door openings, side windows, etc, so structurally nothing is really being taken away - it's more of a repositioning of the windshield and "canopy fabrication".

    The door mirrors take a hike and four cctv lipstick cams are installed. One for each mirror, one directly out the rear, and one for the front view looking out as the driver would.

    I'd consider lowering the entire suspension an inch or two but not before aerodynamically cleaning up the underside a bit.

    In the rear, I'd give it the Queen-Mother_Mary of boat-tails - but it would need to still provide access to the cargo area. I've followed the threads of some that others have built but as a starting point for this, am partial to the one that Redneck fabricated for his Metro:
    http://ecomodder.com/forum/showthrea...yle-26022.html
    He has some fantastic mpg numbers for his work in that area and I've had the pleasure of meeting him twice as well.

    Overall the Mirage would end up resembling something Aero-Old and something Aero-New. The folks at Mitsubishi gave this vehicle a real good start. The engine is a stroker and the CVT comes in low and strong just like the Changzuki does (I did this back in 2004 and the Mirage's CVT behaves like mine does so I'm very happy and impressed with it.) Mechanically I'd leave it alone and just go for the aero. Lessening the wind resistance on this car should also help to lengthen the life of the drivetrain considerably over the life of the car due to less stresses to overcome it (that is an opinion piece on my part but I do actually believe it!)

    At this point I need to leave this posting since it gets me juiced to the point where I really want to attack this Mirage. It's Friday night, I don't have cable...... time to do another "Looking good for the long haul!" posting before I get into trouble....

    Have a great evening!
    ~CrazyJerry


Posting Permissions

  • You may not post new threads
  • You may not post replies
  • You may not post attachments
  • You may not edit your posts
  •