Page 2 of 4 FirstFirst 1234 LastLast
Results 11 to 20 of 34

Thread: Flat sway bar?

  1. #11
    Senior Member
    Join Date
    Nov 2014
    Location
    Oklahoma
    Country
    United States
    Posts
    327
    Thanks
    21
    Thanked 178 Times in 76 Posts
    Quote Originally Posted by namco View Post
    Do it up, see if it works.

    ADVICE: It may or may not work. 5.5" of flat material might be too bulky, you also have to think about wind flow/resistance once its under there as air does move by. if the angle is from front to rear, top to bottom (as in "\") it will cause air lift like a rear wing pushing the rear of the car up off the ground at higher speeds. Judging by how the spring angles are, this wont work. But i could be wrong because I don't have the car in the air this instant to look....


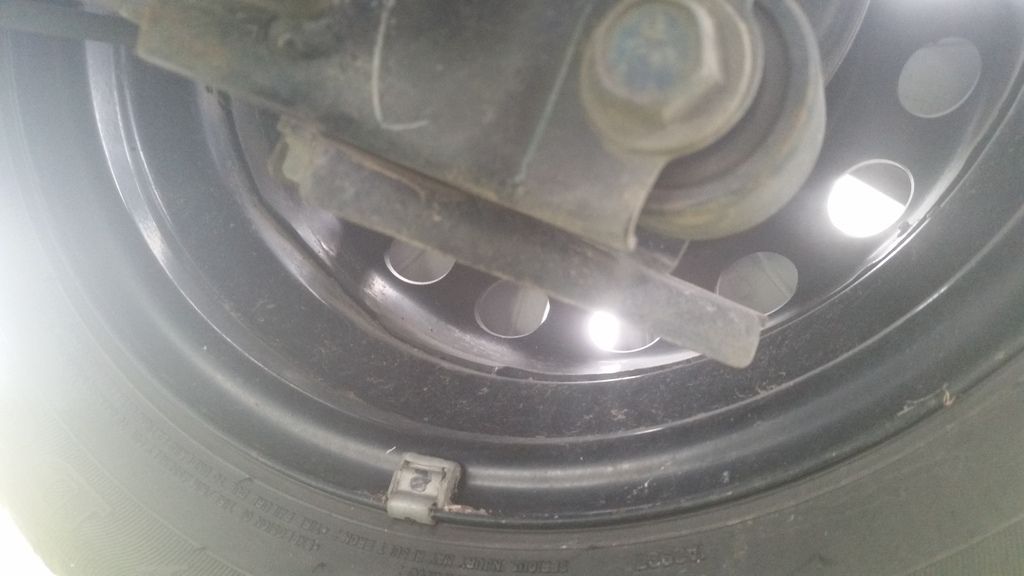
    In this picture, left is front and right is rear of car right? The angle in this instance with a flat 5.5" metal bar is going to cause lift.....
    You're correct, if the sway bar sat at that angle, it would cause the car to lift. But think about that picture - I took that picture while laying on my side under the car. I'm 6ft and 225 pounds - I can't get under the car that far unless it's jacked up, and in this case, the car's chassis was on stands while the rear wheels hung in the air. When the car is on the ground, that part is level.

    My biggest worry isn't creating lift under the car, my biggest worry is that the spring steel will catch the air and vibrate. But I can engineer a way around that fairly easy.

    And of course it won't work. I'm going to find out WHY it won't work.


  2. #12
    Senior Member
    Join Date
    Nov 2014
    Location
    Oklahoma
    Country
    United States
    Posts
    327
    Thanks
    21
    Thanked 178 Times in 76 Posts
    I did a bit more work, but I ran into an electrical problem.

    Not with the car, mind you, but with my shop. I got the rings drilled and set under the springs, the angle drilled for the "legs", and I went to cut them down to the right length... hit the trigger on the saw, and I was plunged into darkness.

    It looks like the spring will tuck nicely behind the front edge of the axle. And I've learned something else while taking the springs out - I can absolutely make some spacers for the springs that can change the ride height.

  3. The Following 3 Users Say Thank You to Tinker1980 For This Useful Post:

    Marklovski (03-13-2016),mitsumi (03-12-2016),Thestunch (03-19-2016)

  4. #13
    Junior Member
    Join Date
    Feb 2016
    Location
    texas
    Country
    United States
    Posts
    22
    Thanks
    12
    Thanked 10 Times in 8 Posts
    must see finished results! thanks for the r&d...

  5. #14
    Senior Member
    Join Date
    Nov 2014
    Location
    Oklahoma
    Country
    United States
    Posts
    327
    Thanks
    21
    Thanked 178 Times in 76 Posts
    I've ordered a set of the VW lowering springs. Next weekend, I will finish up the sway bar, when I install the springs. Looks like I'm just going to give up and take the pieces to work, where I can cut them with a good saw.

  6. #15
    Senior Member
    Join Date
    Nov 2014
    Location
    Oklahoma
    Country
    United States
    Posts
    327
    Thanks
    21
    Thanked 178 Times in 76 Posts
    I received my VW Beetle lowering springs today. And a another member posted his idea for torsion beam clamps, which got wheels turning on my little project - I think I'll clamp the flat spring directly to the bottom of the torsion beam. Can't wait for the weekend.

  7. The Following 2 Users Say Thank You to Tinker1980 For This Useful Post:

    cyclopathic (03-23-2016),RedRage (04-22-2016)

  8. #16
    Moderator Eggman's Avatar
    Join Date
    Sep 2015
    Location
    Cleveland, Ohio
    Country
    United States
    Posts
    10,231
    Thanks
    4,062
    Thanked 2,820 Times in 2,126 Posts
    Quote Originally Posted by Tinker1980 View Post
    I think I'll clamp the flat spring directly to the bottom of the torsion beam.
    How do you plan on clamping? Temporary C-clamps?

        __________________________________________

        click to view fuel log View my fuel log 2015 Mirage ES 1.2 manual: 49.6 mpg (US) ... 21.1 km/L ... 4.7 L/100 km ... 59.5 mpg (Imp)


  9. #17
    Senior Member
    Join Date
    Nov 2014
    Location
    Oklahoma
    Country
    United States
    Posts
    327
    Thanks
    21
    Thanked 178 Times in 76 Posts
    Quote Originally Posted by Eggman View Post
    How do you plan on clamping? Temporary C-clamps?
    U-bolts are the first thing that comes to mind. However, once I get some axle measurements I can fab up a bracket that will snugly fit around the axle, and bolt to the spring steel, which will sit flat against the bottom of the torsion beam part of the axle.

  10. #18
    Moderator
    Join Date
    Jul 2015
    Location
    Mitsu
    Country
    United States
    Posts
    1,359
    Garage empty: add car
    Thanks
    256
    Thanked 315 Times in 246 Posts
    Quote Originally Posted by Tinker1980 View Post
    U-bolts are the first thing that comes to mind. However, once I get some axle measurements I can fab up a bracket that will snugly fit around the axle, and bolt to the spring steel, which will sit flat against the bottom of the torsion beam part of the axle.
    Sitting flat? I would worry about paint rubbing off you need a gap, coating or gasket.

        __________________________________________

        click to view fuel log View my fuel log 2015 Mirage DE 1.2 manual: 46.4 mpg (US) ... 19.7 km/L ... 5.1 L/100 km ... 55.7 mpg (Imp)


  11. #19
    Senior Member
    Join Date
    Nov 2014
    Location
    Oklahoma
    Country
    United States
    Posts
    327
    Thanks
    21
    Thanked 178 Times in 76 Posts
    Quote Originally Posted by cyclopathic View Post
    Sitting flat? I would worry about paint rubbing off you need a gap, coating or gasket.
    You sound like my father. Yes, I'll make appropriate adjustments for the obvious.

    I've installed the rear VW springs, and while they went in there the fit was not... ideal. I'll have to make some spacers. The top of the springs doesn't quite fit the way I'd like around the body posts - they aren't going to move, but I'd like them centered a bit better. Some rings made of 1/2" plate, attached to some larger OD rings made of 11ga or 12ga should work great, along with a flat rubber spacer to prevent squeaking. Soon enough I should be able to make an entire package. Lol. Before I get too involved though, I'll look and see what the stock rubber bushings for the volkswagen are supposed to look like - I may grab a couple of those instead.

    I tried taking the car around a sharp left hander down the road from the house. With just the rear VW springs, installed in the rear of the car, body roll was greatly reduced. The ride seems nicer too. Putting in the fronts is a little too involved a project right before work. Maybe this weekend.

  12. The Following User Says Thank You to Tinker1980 For This Useful Post:

    Eggman (03-24-2016)

  13. #20
    Senior Member
    Join Date
    Nov 2014
    Location
    Oklahoma
    Country
    United States
    Posts
    327
    Thanks
    21
    Thanked 178 Times in 76 Posts
    Just drove to work with the new springs on the rear. Corners much better, handles the piss poor pavement better.


  14. The Following User Says Thank You to Tinker1980 For This Useful Post:

    MetroMPG (04-07-2016)

Posting Permissions

  • You may not post new threads
  • You may not post replies
  • You may not post attachments
  • You may not edit your posts
  •