Results 1 to 3 of 3

Thread: Modifying headlight assembly

  1. #1
    Senior Member mitsumi's Avatar
    Join Date
    May 2015
    Location
    Manila
    Country
    Philippines
    Posts
    1,243
    Thanks
    766
    Thanked 469 Times in 288 Posts

    Question Modifying headlight assembly

    Hi All,

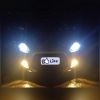
    I just wanted to ask, because i was thinking of blacking out the outer part of the headlight just like in the DIY modifications, but I just wanted to know, maybe its possible to do something like the Chevy Sonic Headlights with with the mirage.

    Like this from the Sonic
    Name:  sonic.jpg
Views: 284
Size:  16.6 KB

    What can be used for the cover? is acrylic fine or it should be glass?


        __________________________________________

        click to view fuel log View my fuel log 2015 Mirage GLS 1.2 manual: 3,108.4 mpg (US) ... 1,321.5 km/L ... 0.1 L/100 km ... 3,733.0 mpg (Imp)


  2. #2
    Senior Member Wallythacker's Avatar
    Join Date
    Nov 2016
    Location
    Niagara region
    Country
    Canada
    Posts
    2,506
    Thanks
    58
    Thanked 556 Times in 445 Posts
    I have no idea how you mold the glass to conform to the headlight housing. I really have doubts you can pull off what you want.
    Zero, 2014 ES Plus 5MT, written off but not forgotten.
    Zero II, 2014 SE, 5MT, climate She's HOME now!
    Shelby AKA "Cute", 2017 ES 5MT, A/C.

    Mirage owners look at the world differently than everyone else, but in a better way
    We're driving the Beetle of the 21st century, the greatest small car now available!

        __________________________________________

        click to view fuel log View my fuel log 2017 Mirage ES PLus 1.2 manual: 39.0 mpg (US) ... 16.6 km/L ... 6.0 L/100 km ... 46.8 mpg (Imp)


  3. #3
    Senior Member
    Join Date
    Nov 2020
    Location
    Central NJ
    Country
    United States
    Posts
    154
    Thanks
    1
    Thanked 90 Times in 56 Posts
    I did one of my headlights today. I tried baking it at different temperatures starting at 170°F and went up to 270°F to get the adhesive to soften. Remove all bulbs and harnesses before heating. I baked them for 10 minutes then separated the lens from the housing. I used a panel tool to pry it apart Start from the outside edge and work towards the inside point. The shape of the housing makes that easier. The part you want to paint is attached to the lens with 3 small Phillips screws.

    Once removed it cleaned it with Napthta, scuffed with 600 grit, then sprayed with primer. I choose gloss black paint and then clearcoated it. Then reattach it to the lens with the screws.

    Then heat it again, I did it twice for 7 minutes each time to reseal the lens.
    Name:  IMG_20230310_144634_01.jpg
Views: 228
Size:  97.4 KB


  4. The Following 3 Users Say Thank You to BillAce For This Useful Post:

    Fummins (03-11-2023),inuvik (03-10-2023),ramrunnr (03-26-2023)

Posting Permissions

  • You may not post new threads
  • You may not post replies
  • You may not post attachments
  • You may not edit your posts
  •