


 2002 Mitsubishi Delica Space Gear L400
Edit: added video's finally...
This will hopefully be a bit of a write-up on how to replace a CVT. I'll just try to write the steps that I do. Others may do things differently. I've done this using a hoist and a transmission jack so I'm cheating a bit but a couple 2-3 jack stands, and a floor jack with a tranny(not that kind)adapter plate should work well enough. I think I may have tried this once before but probably missed a ton of steps...
1. First I removed the hood(12mm) and unhook the washer hose at 90' fitting near the cowl. Gives more light this way.
Attachment 25217
2. Then started unhooking and removing the battery(10mm). Battery tray(12mm and 10mm) 10mm box end wrench to remove plastic clips that hold wiring to brackets. unclip the PTC heater fuse box from the front of the tray.
3. Remove the air cleaner(10mm), intake pipe from the throttle body, and crankcase vent from the intake pipe(1 spring clamp).
4. Remove coolant overflow just because. Pull the hose off the rad and lift the jug straight up.
5. Remove the shifter cable from the transmission(remove the 14mm nut at the pivot rather than pin at the end of the cable, that way you don't have to fiddle around as much trying to adjust the cable later, they're usually pretty much plug and play from car to car)and hold down bracket(12mm bolts, just remove the 2 bolts rather than fight with the "quick release" mechanism).
6. Drain the rad. Might be a good idea to remove the plastic shield that runs along to the bottom of the rad support first so it doesn't run all over the place.
7. Drain the transmission.(or can do this later when the car is up in the air if not already) Pull the plug and let it drain. Preferably after rad is drained, or not. Your call. If you don't drain the transmission, fluid will pour out when you pop the axles out later.
8. Loose wrench you just had a minute ago.
9. Remove the throttle body(10mm) 4 bolts, unplug t-body and map sensor. Lift up and tie out of the way. Don't have to completely remove it, it can hang by the coolant lines.
10. There are 3 12mm bell housing bolts along the front of the engine/trans. 2 are from the trans side into the engine and one further down above that bolts from the engine side into the transmission. It's snug getting the lowest one off. If you're really rammy with things maybe leave the easiest-to-remove bolt in place for now.
11. Unplug the prndl switch(the black plastic thing where the shift cable was just removed from). And there are 3 speed sensors, one on the front(primary clutch), one on the top rear(secondary clutch) and one further down near the lh axle(output speed). The big round connector down below is best left til later and accessed after lh inner fender is removed.
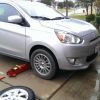
12. Lift the car up if not done already.
13. Remove the starter, 2 12mm bolts, 12mm nut for the power wire, smaller wire removes by pinching the connector in the right spot(where it's springy) and it'll pull off.
14. Remove the little aluminum bracket that bolts to the engine and trans near the dogbone mount. (3 12mm). Can remove dogbone mount 3 17mm bolts. Remove the inspection cover 2 more 10 or 12mm bolts.
15. Spin the engine til you can see the torque converter bolt. 17mm. I use a serpentine belt tool to remove the bolts(4).
16. remove the bracket holding the shifter cable(12mm)near the rear of the trans and wiring to the speed sensor(10mm) and...12mm bolt holding ground wire to the top rear of the trans case.
17. Remove the heat shield for the cat above rh inner cv joint.
18. At any time you could remove the front wheels(21mm), tie rod ends from spindles(17mm nut then whack the edge of the spindle with bfh making sure not to hit the threads). Use a sacrificial flat screw driver, small chisel or even a big nail if that's all you got, to uncrimp the axle nut. Make sure you do this, if you don't and try to spin the nut off you chance destroying the threads of the axle. I've learned the right and wrong way to do this for you. Remove axle nut (with impact preferably)32mm nut.
19. Now this is where others may do this differently.To get the axles out of the spindles, I remove the ball joint nuts and shock the spindles loose from the lower ball joints. It often takes a couple of good whacks in the right spot for this to work. The other way you could this is to remove the 2 bolts that hold the spindle to the strut then let the spindle hang off the ball joint. The only possible down side to this method Other than having to remove the caliper and wiring from strut etc...is if you have camber adjustment bolts installed by an alignment shop then you're gonna want to get an alignment after you re-assemble the car, or you might be able to just mark the strut and spindle before disassembly with a paint marker and put it back the way it was and be good enough. I just pop the ball joint off and let everything hang off the strut, out of the way.
20. Remove hoses from cvt cooler and rad. I remove from the bottom, one hose off the cvt faces down, and the other hose can just be removed from the bottom of the rad. Easy enough, just spring clips hold them on. Replacing with worm style clamps might not be a bad idea, these clamps are somewhat prone to weakening over time/use and can cause leaks.
I'll add to this later. Will try a video if I can one of these days/weeks.

 Reply With Quote
 Basic
Basic

 Bae
Bae


 Shelby
 Zero
Zero Zero Sen
 Blueberry
