[Tutorial] How to: Plastidip (Various Parts/Articles/Tips)
Hello, and welcome to my strategically, and meticulously detailed article presenting a tutorial crash course on:
HOW TO PLASTIDIP YOUR 2014 MIRAGE!
**WARNING**
While in practice, and in theory due to the composition of PlastiDip and the fact that it's a rubber compound broken down in order to be applicable through spraying methods there are certain instances in which it MAY cause damage to either your paint, surface, or otherwise.
Always do a small test on a part of the surface that isn't normally visible, or noticeable before applying the actual "coat" that you'll be putting elsewhere.
ON TO THE GUIDE
============================
Index
------------
1. Tips and tricks before you get started
------------
2. How to PlastiDip your Front Bumper
2a. Materials Needed
2b. Prepping the work area
2c. Taping or "Masking" the area
2d. How to apply the PlastiDip
------------
3. How to PlastiDip your Front /Back Emblems
3a. Materials Needed
3b. Prepping the work area
3c. How to remove the emblems
------------
4. How to PlastiDip your Fog Light Assembly
4a. Materials Needed
4b. Prepping the work area
4c. How to get PlastiDip in the cracks/crevices
4d. How to remove PlastiDip from the areas that are too small to peel from
------------
More guides to come later
Chapter 1.
Tips & Tricks before you get started.
1. Tips and tricks before you get started
¤ Instead of masking the hood...pop/pry it open to prevent it from getting sprayed.
¤ Use blank paper (Toner printer paper works best. - At $4USD per 500 Sheets there's no reason not to. I say toner paper works best for a few reasons:
1. It's blank
2. It's cheaper than inkjet paper
3. Inkjet, and toner paper are made ENTIRELY different. Inkjet paper is made with special fibers to absorb the ink, while toner paper is coated to prevent soaking thus creating a "drip" surface that'll be on your car instead of the inkjet paper that may get soaked, and seep through to your car.
¤ Work your way up from the bottom when applying mask/tape. That way the gravitational pull won't pull dripping paint behind your tape, but in front of it (Stair effect)
¤ When applying tape always double coat areas where tape meets so that it's sealed from both sides of the "entrance" to the tape's joint.
¤ While recommended to apply PlastiDip in VERY light coats 10-20 minutes apart you'll find that if done thin enough you can do more coats making a stronger bond, and wait a fraction of the time (I put on 25 coats that were still transparent after about 10-12, and waited less than two minutes between each which resulted in a THICK coat, but also made it easy to remove when dry since it was stronger, and easier to cut.)
¤ IF you decide to paint it all at once, and do multiple coats within a few minutes and remove the tape while it's still wet MAKE SURE TO LEAVE THE BOTTOM PARTS IN CASE IT DRIPS!
¤ IF the PlastiDip begins to form a drip (this is only able to be done IMMEDIATELY after applying the PlastiDip as each new layer bonds instantly) take a blow gun at around 12-15PSI and blow on it in small bursts from about 4" away to "nudge" the drip bubble to the side, down, or wherever. Alternatively, you can take a shirt and VERY lightly press on it to let the fibers soak up the wet bubble but it will leave a small area needing to be sprayed again resulting in uneven coat, and possibly more issues.
¤ If your edges curl while peeling tape, or don't line up evenly - Don't sweat it. Just take your razor blade and VERY lightly cut the PlastiDip (takes a little more effort than you'd think so don't be a pansy about it) Don't worry about scratching the paint off the plastic bumper. Plastic is painted an ENTIRELY different way than steel, and fiberglass, and is FAR more porous so there's a lot more paint on there than you think there is, and that thin blade won't hurt it so long as you stay moderately below "hand pressure" while cutting.
¤ Instead of sliding the razor down the tape line while it's still on, pull the tape off at a 45 degree angle, and slowly flick your razor across the PlastiDip as it peels away from the car cutting it, but keeping it taut.
¤ I used RainX Bug Remover as my initial wash on the bumper, then followed up with some regular car wash concentrate, then rinsed it off with a gallon of distilled water, and dried it with viva paper towels, and a t-shirt. The result was a perfectly smooth surface in the end.
¤ When spraying areas that are near cracks take EXTREME caution...it's an utter pain in the ASS to get PlastiDip into a crack...here's what I did. I sprayed the end of a rewards card for a local pharmacy (Size of a credit card, and made of plastic) then crammed it into the corner to get it in there nice and good, THEN proceeded to spray as I typically would.
This resulted in areas of coverage that I simply COULD NOT get before no matter how heavy the coat, or how many I put on.
¤ If you're spraying a heavy coat...THEN GET IN THERE, BUT MOVE THE CAN FAST. I'm talking cover a foot wide width in about a second, and do so from about 2" away. any slower/closer and you'll get dripping.
¤ If you're doing light coats then BACK UP, AND SLOW DOWN
¤ When painting START FROM THE BOTTOM UP
¤ When you get close to an edge RELEASE THE TRIGGER ON THE CAN. Don't just hold it, and move back over that area. Release the trigger, and then go back to the area below where you started before, and start again trying not to cover your tracks until the next coat. This is the best tip to avoid drips.
Chapter 2.
How to PlastiDip your front bumper
2a. Materials Needed
¤ 2x Rolls of Masking Tape OR Painters Tape
I have come to find that whilst utilizing PlastiDip the brand HONESTLY doesn't matter. I've tested with everything from Frog tape with "paintlock" to regular dollar store masking tape and it ALL worked the same (Although the dollar store masking tape was harder to get off, and left traces on the ABS plastic - so you may want to put that into consideration.)
I also found that while going around tight areas it was more beneficial to use the 1/2" masking tape than the 1.88" strips since it was more malleable (It moved easier around bends/curves.)
¤ PlastiDip in your choice of colors (I chose black for mine with the PlastiDip "glossifier" as an "extra option" (really just wanted to use glossifier anyways, but needed a chance for the car to sit overnight since it requires at LEAST four hours, but it's better to wait as long as possible with it since it stays sticky for QUITE some time.
¤ A razor blade / Razor Blade Knife / VERY sharp knife with thin blade, and very sharp tip
¤ A well ventilated work space with minimal dust/debris
2b. Prepping the work area
Step 1. Wash the area THOROUGHLY
Step 2. Wash it AGAIN with Windex, or some type of ammonia/alcohol based cleaner
Step 3. RINSE IMMEDIATELY (Alcohol acts as a thinner if left on too long with plastics)
Step 4. Rinse again while using a microfiber towel, or t-shirt without any silk-screening, printing, or otherwise non cotton material on it. (Silk is okay to use if you feel rich enough, obviously)
Step 5. Dry with a Microfiber Cloth, Air Compressor, or Shammy Towel
2c. Taping or "Masking" the area
¤ Using a VERY light pencil stroke, or watercolor marker, etc. mark the line where you think you'd like to tape it. I found that the Mirage's intake, and Radiator slots were SLIGHTLY different in width resulting in an angular shape to be necessary if done straight up and down causing a VERY distorted look.
This caused me to use the following method or "design"
I went diagonally from the rolled edges of the intake, and started at the black plastic then went down to the area that "humped" out of the bumper (where it became flat on the front.) After that I ripped the tape then proceeded STRAIGHT down to the radiator rolled edge meeting its black plastic forming a distinct look that was easy to mimic on the other side. ( Will include up close picture diagram later.)
Tape or mask off the area right next to where you want the PlastiDip to stop.
Tape , and mask the ENTIRE front of the rest of the car besides the area you want painted.
2d. How to apply the PlastiDip
While I pretty much summed it up in Tips/Tricks I'll recap in a concise manner. Go super light, do multiple coats. the more the better. When painting close to an edge release the trigger, and stop painting, NEVER back track.
Remember that PlastiDip is thinned spray-able rubberized compound, thus it's FAR heavier than ANY spray paint(yes, even those used on decks.)
PlastiDip is extremely light when not in a "stream" I've even found some ON TOP OF THE CAR so try to mask off everything you can as best as possible using the bottom to top staircase effect. It's better to be too careful than regretful.
Chapter 3.
How to PlastiDip your Front /Back Emblems
3a. Materials Needed
¤ Cardboard / Surface to paint on
¤ Flathead Precision Screwdriver
¤ Large Flat Head Screw Driver / Panel Removal Kit
¤ Something to use as a fulcrum for the screwdriver/removal tool
¤ PlastiDip and/or glossifier
¤ Scotch Tape® Brand Outdoor Mounting Tape (Clear) Code 410, or higher (410 is 5LB holding which is MORE than enough (any higher may damage your plastic/paint)
¤ Goo Gone (just in case there's sticky gunk on the hood area, or back of the emblem that needs to be removed.
3b. Prepping the work area
Clean the emblem with Window cleaner or any other Ammonia, or alcohol based cleaner. Make sure to rinse it off, and dry it THOROUGHLY using a cloth that won't leave fibers behind doing so.
3c. How to remove the emblem
The front hood emblem is actually sunk down in a recessed chamber. The edges of the Mitsubishi logo go down into the recess, but the areas of the logo that are inside the edges are actually on a surface that's raised to the same height of the hood. It's for this reason alone this thing is a PAIN to remove.
¤ Start by using your fulcrum (so you don't scratch the paint unnecessarily) to SLOWLY pry the Mitsubishi logo up little by little. Once you feel it giving enough leeway to get a bigger screwdriver, or panel removal tool under there try to pry it up from the middle. This emblem is more sturdy than the rest of them, but it's still kind of flimsy in the middle (it's made of plastic, after all.
¤ Slowly continue pulling it up, and prying it up taking great care not to force it, or go too fast. Easy does it on this project (it took me nearly five minutes to get mine off but it didn't even crack so I'm happy.)
¤ Once you get the emblem off remove all the glue/tack from the bottom of the emblem, and the raised mounting surface that it was on. Place it onto your painting surface, and begin to paint.
¤ You can paint this pretty much all at once.
BUT!
¤ Due to the many small corners, and tiny creases getting the PlastiDip to stay proved difficult. I just soaked it in dip, and let it sit there for four hours until it dried.
¤ The back emblems use the EXACT same method for removing, and painting. The ONLY exception is that these emblems are surface mounted, easier to crack, and require a LOT more patience.
Chapter 4.
How to PlastiDip your Fog Light Assembly
4a. Materials Needed
¤ Masking Tape
¤ Razor Blade
¤ Steady Hand
¤ TONS of Patience
¤ Extra PlastiDip (You're almost guaranteed to mess this up a few times.
¤ Paper (To put over the lights - I know a trick instead of wasting tape 
¤ Some type of credit card/rewards card you don't mind using for small cracks
¤ Forceps (I used curved forceps to grab the PlastiDip that was pulling, but too small to grab, if you have nails this may/may not be a necessity. Obviously needle nose pliers can do the job if they're small enough as well as needles, pencils, pen tips, etc. (you get the point) - no pun intended.
4b. Prepping the work area
¤ Clean the Fog Light assembly just as you would the bumper outlined in Chapter 2 Section 2b.
¤ Mask off the area. I began the mask just at the outside curve of the outer edge of what "would be" the "fog light assembly" if it weren't a solid piece of the bumper.
¤ To cover the foglight fold a sheet of paper in half then cut it into a square slightly larger than the bulb of the fog light. Insert the corners of the sheet atop the bulb behind the plastic and flatten it out from the middle. (The forceps or small pliers are put to good use removing the paper here too.
4c. How to get PlastiDip in the cracks/crevices
¤ You can either:
A. Lay it on thick 'n heavy. Just keep layering the PlastiDip on coat after coat until they're covered.
B. Use a credit/rewards card sprayed with PlastiDip to "manually paint" inside of them.
C. Use a small paint brush, and manually paint inside of them
D. Spray thick heavy coats meticulously aiming for those areas, and just let it all drip off (honestly I had NO problems what so ever with drip bubbles on the fog light assembly area for some reason, and this is the method I chose in combination with method A. as I'd already had a few "failed" coats on there from before (why bother removing them, right 
4d. How to remove PlastiDip from the areas that are too small to peel from
Well...that's a tough one.
What I did was:
Use my razor to slowly cut around the edge of the inside of the crevice near the fog light area I wanted to keep. Then proceeded to wrap a Viva Paper towel around the card 1 time and gently slide the card using the paper towel and curved forceps to catch the PlastiDip, and basically act as a "small thin finger" to nudge it all loose. It worked pretty well, and I'm fairly certain what I couldn't get will be gotten when/if I power wash this thing/blow it out with my air compressor set to ~ 50 PSI.
**DISCLAIMER**
Mirageforum.com, Dipyourcar.com, Performix, Mirageforum.com members, and myself are NOT in any way responsible, nor do we take responsibility for your use of this guide, or its content or any outcome therein. All interaction with your the PlastiDip product, and/or its sister products, or any third party modifications, or products installed, or applied to your car are done SOLELY at your own discretion and no fault is of the Performix company, Mirageforum.com or its members, myself, or your inability to properly read a guide, and execute the steps.
Last edited by Dracconus; 04-17-2014 at 03:37 PM.
__________________________________________
 View my fuel log 2014 Mirage ES 1.2 manual: 36.2 mpg (US) ... 15.4 km/L ... 6.5 L/100 km ... 43.5 mpg (Imp)


 Chimera
 Reply With Quote
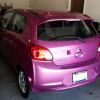 Purple Haze
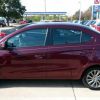 Wine Red
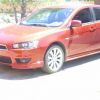 2008 Mitsubishi