For right now, I am keeping the stock headunit.
I have a pair of Infinity 6032si 6 1/2" speakers to go up front. With their 2 ohm impedence it will help to get a bit more power to them. The back speakers for now are still stock, and I will be wiring up a line level converter to the rear speakers which will feed signal to the subwoofer amp.
I am mounting the sub amp and a 400 watt power inverter under the driver's seat which leaves no more room for another amp under the driver's seat. Down the road, I might add one of those Alpine, behind the dash 4 channel amps to power the front and rear speakers. At that time I'll probably change the factory radio out.
I am working on a very limited budget right now. So because of that, I can only do a little bit at a time. Right now, I've got about $100 invested in everything. That is the front Infinity speakers, the Polk Audio 8" sub, the line level converter, and a big sheet of ABS plastic so I can make my own speaker brackets. I traded an old Sony Xplod 1000 watt amp that I got for free for my JL Audio sub amp, the speaker wire I have picked up from garage sales for dirt cheap (I bought 50 feet of flat Monster Cable speaker wire for $1), and I picked up 25 feet of 4 gauge wire from the local junk yard for $10.
I never pay retail!


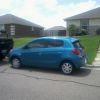 2014 Mitsubishi Mirage ES
 Reply With Quote


 Bae
Bae

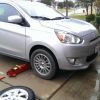
 2015 Test Mirage
 Swarthy