Welcome back to Part III of the DIY - Looking good for the long haul! (Rust protection for the front/rear doors)
In Parts I & II we undercoated the front and rear wheel well areas and went the extra mile by painting the front calipers and the rear drums to give it a better shot at looking good years from now.
In Part III the rear doors are going to get a swath of undercoating. Here in Northern NY, many-a-car has rusted from the inside-out but this doesn't have to happen if you have a few extra bucks and some free time.
-----------------------
***DISCLAIMER***
-----------------------
What follows is the removal of the rear door inner trim pad to get a better look at what we're dealing with. The procedures for this segment will be general and probably not all-inclusive so if in doubt about anything, ask questions or do a little research before you make a mess or wreck your new car. In the same way there are those who should never carry anything sharper than a wet paper towel, there are those that should never attempt to hands-on repair an automobile. Going one step further, please consider this writeup for entertainment purposes only - I assume no liability - CrazyJerry
Moving on - Let's look inside those rear doors!
--------------------------------------------------------------
1,986 miles - still new - do I really want to do this? YES!
--------------------------------------------------------------
A peek inside the rear doors requires the plastic inner trim be removed. EVEN IF YOU ARE A BULL IN A CHINA CLOSET YOU CAN DO THIS...
For the job, we'll need a regular phillips screwdriver and something to drink.
That's it?
Yes, that's it.
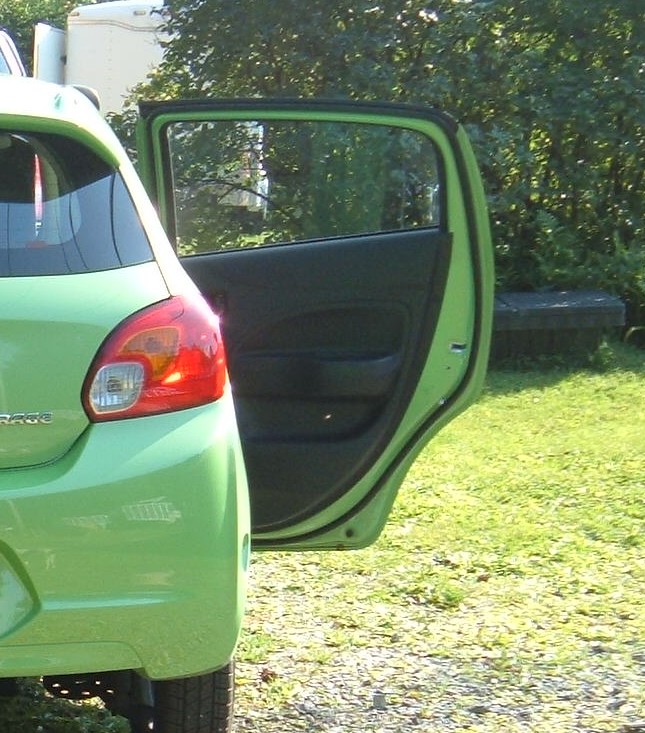
Step 1: Open your rear door(s) and take a look at the inner trim pad.
.
.
.
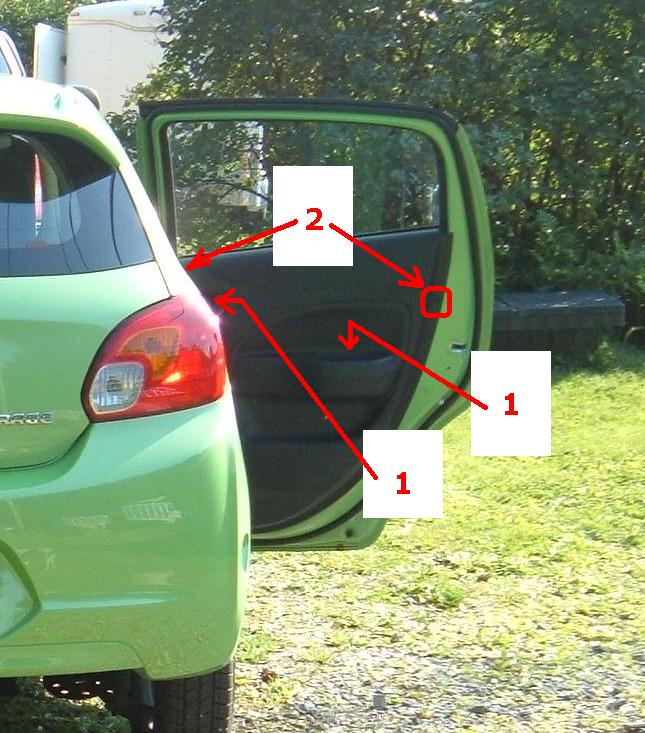
It's easy to find the four black phillips screws that will need to be removed. The photo below shows the location of these screws. (Two on the outer/upper edges, one more or less behind the door unlatch handle, and one in the well of the door close pull.)
.
.
.
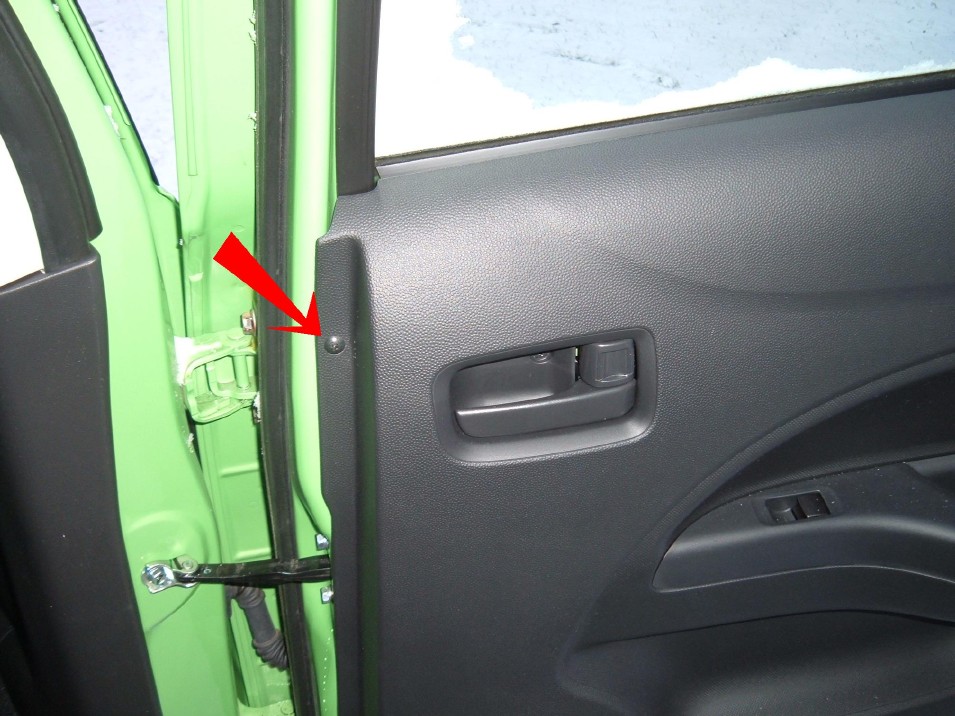
**Update 11/29/2014**
Note the following screw location on the rear door trim pad for the 2014 Mirage:
.
.
.
Then note, the 2015 Mirage has omitted that particular screw.
Thanks to ToXiQ for the tip and the following photo:
.
.
**End of update**
.
.
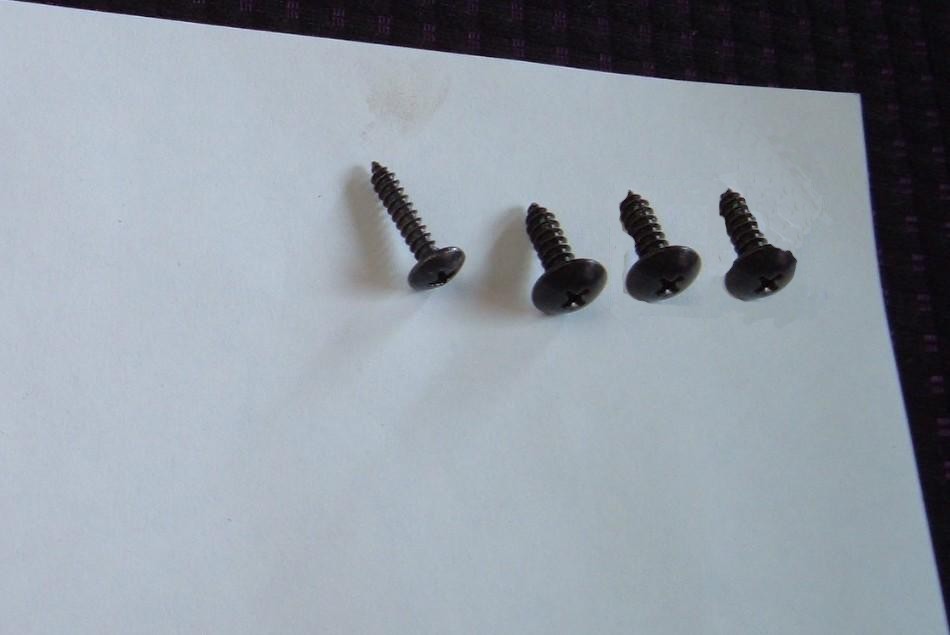
The screw behind the door unlatch handle is the odd one and does not match the other three. It's thinner and longer so take note...
.
.
.
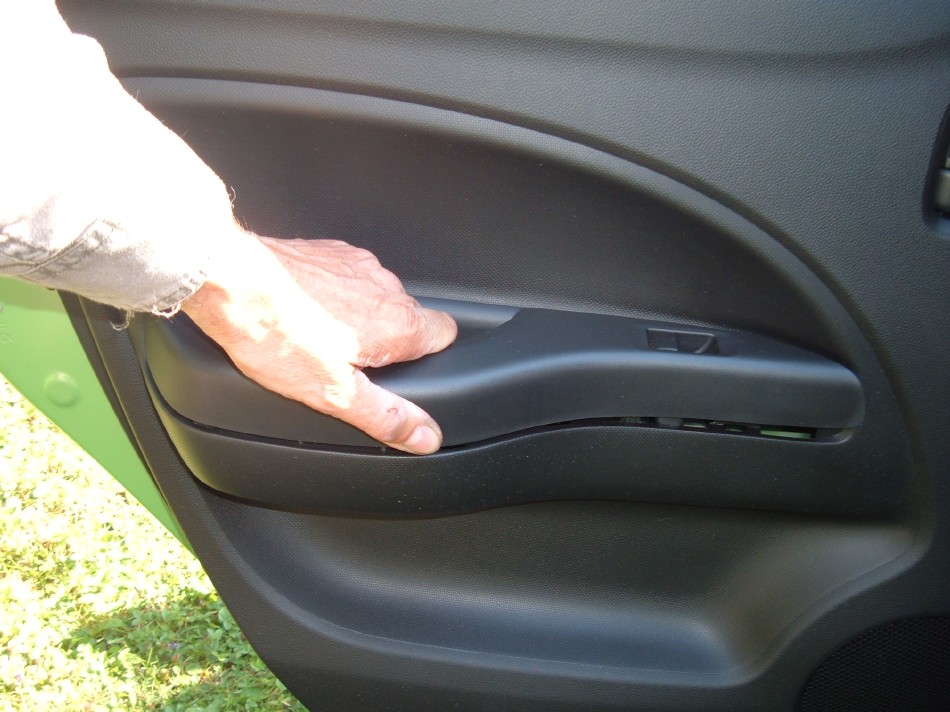
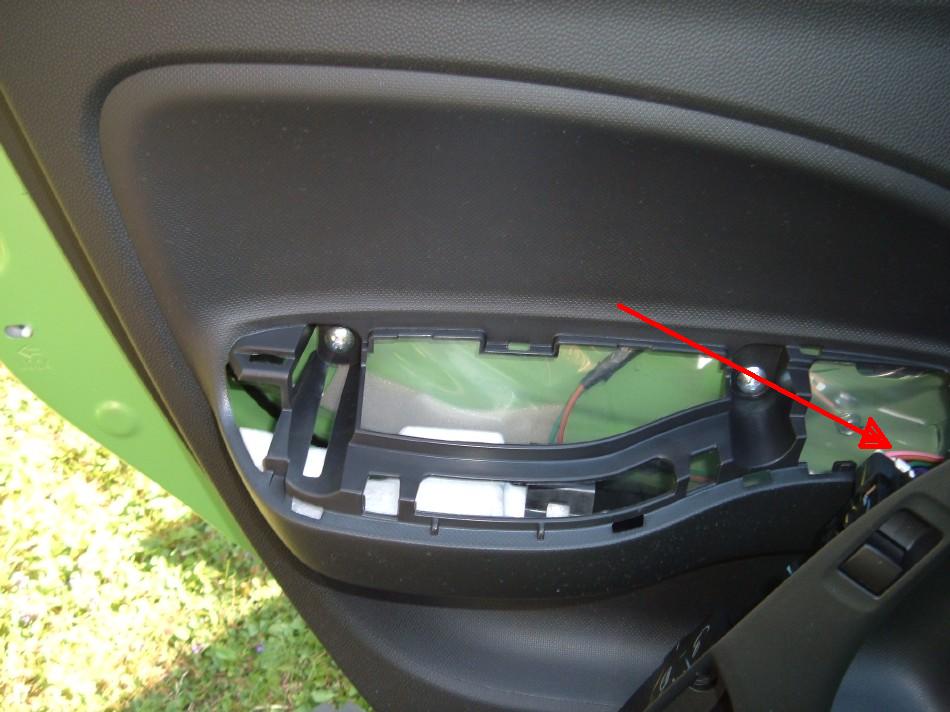
Now, there's two additional silver screws that have to be removed but to get at them, you'll need to remove the door pull that you previously took the screw out of. There is a procedure, and for all you Hulk's out there: CAUTION! Tone it down a little for this part. "Gently" squeeze the door pull like the photo shows and at the same time, pull upward but just for a couple of inches (you're not looking to rip this thing off it's mount and fling it across the street all in one motion.). Squeezing the door pull will release the "barbs" that hold it down and when you raise it you'll notice the power window control wires (if your car has them) attached:
.
.
.
If your rear windows are up, then go ahead and unplug the window control. If not, it's going to be a good idea to roll up the rear windows now.
**NOTE: If you unplug the rear window control and think you can use the driver's control to roll it up - think again. Control switch must be plugged in to make the rear window go up or down from any control...
.
.
.
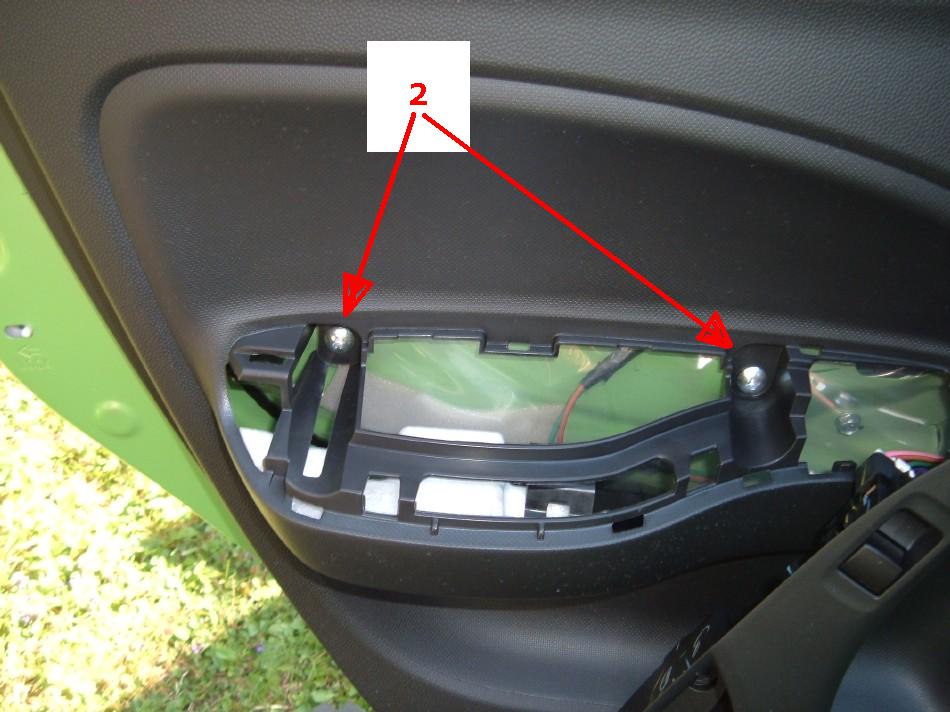
With the door pull out of the way, you should now easily see the last two silver phillips screws that need to be removed:
.
.
.
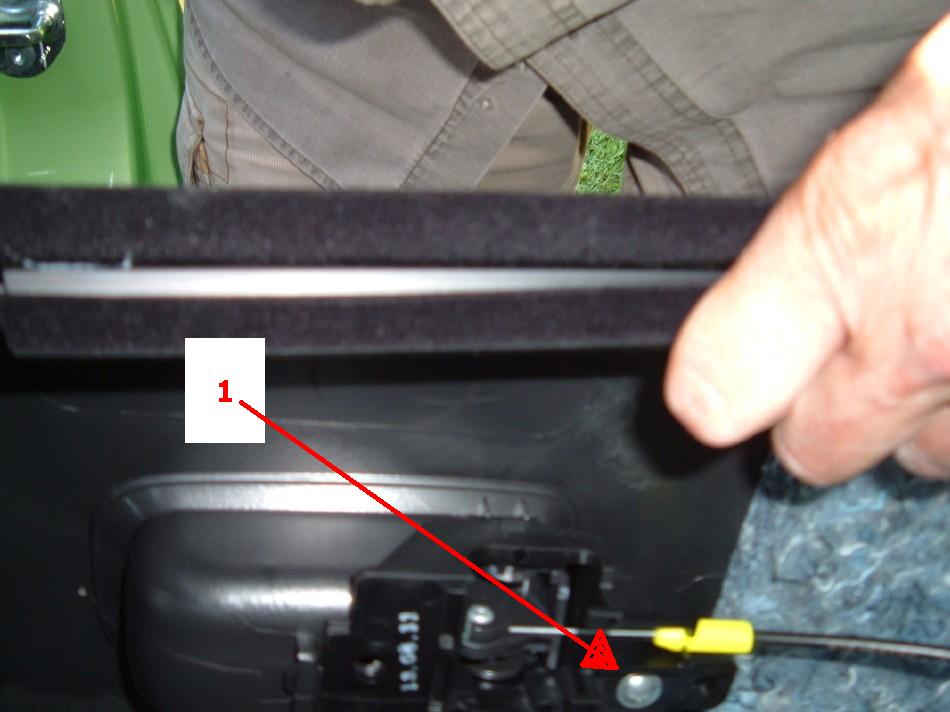
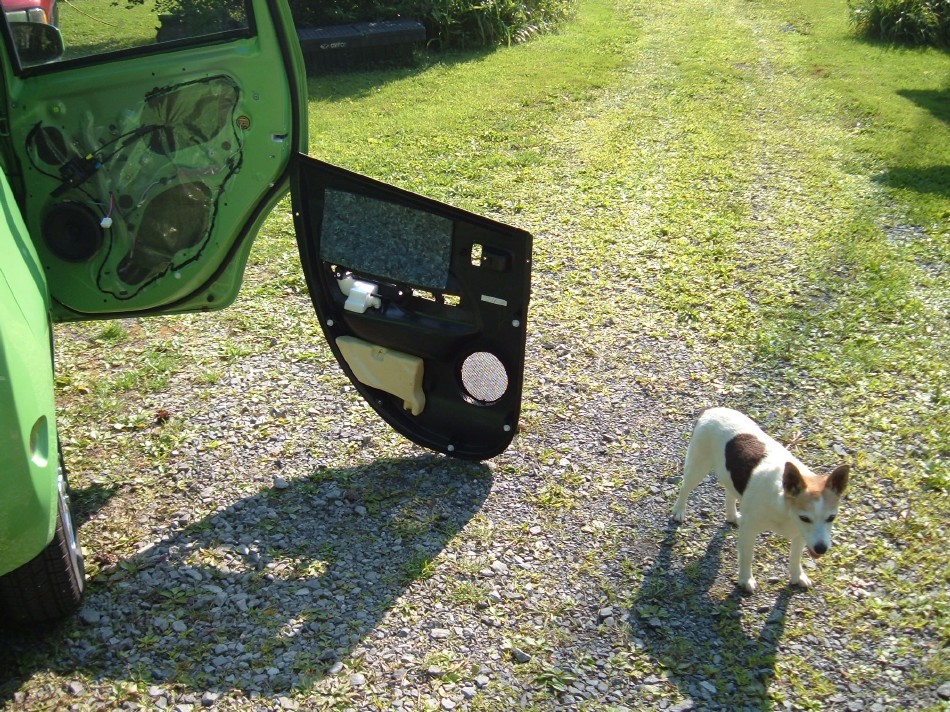
Once the last two silver screws are out the fun begins! It's time to remove the trim pad. I found this quite easy to do without any additional tools but you may need the assistance of something thin and relatively strong such as a butter knife of a long thin flat-tip screwdriver. To remove the door pad, look over at the area between the door hinges and using your hands you should feel a "lip" that you can get your fingers onto. I found I could get both hands on this slight lip and with a short brisk tug, the fasteners would "pop" loose. Once you get the feel for this, you'll have no problem figuring out where the rest are. Just be sure when pulling to space your hands out a bit to spread the pressure more evenly over the door pad. With the door pad loose, you'll notice it still won't be completely free to set aside. The door handle and cables are still attached from the backside with one lonely silver phillips screw:
.
.
.
If you were successful holding the trim pad between your arm and leg while unscrewing the door handle/cables, then you should be able to set it aside:
.
.
.
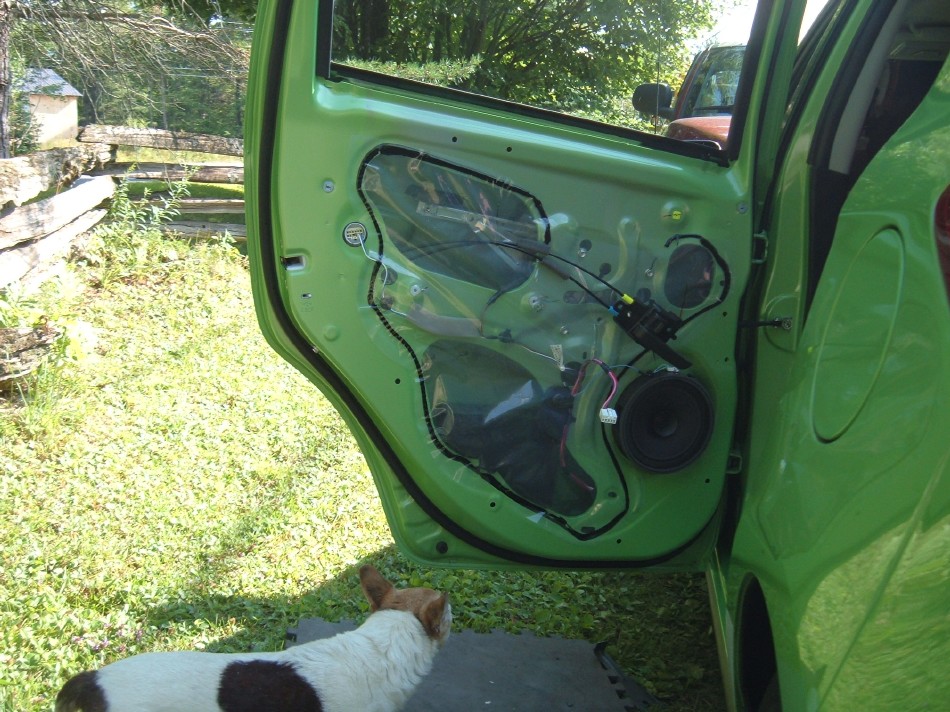
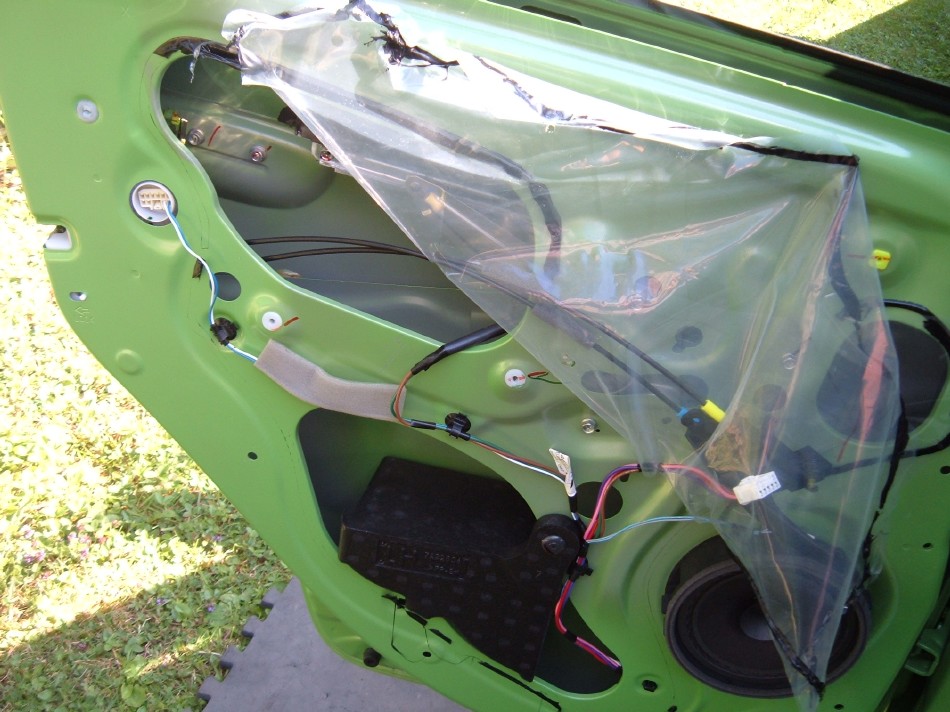
With the pad out of the way, we now get our first look at, well...... more plastic:
.
.
.
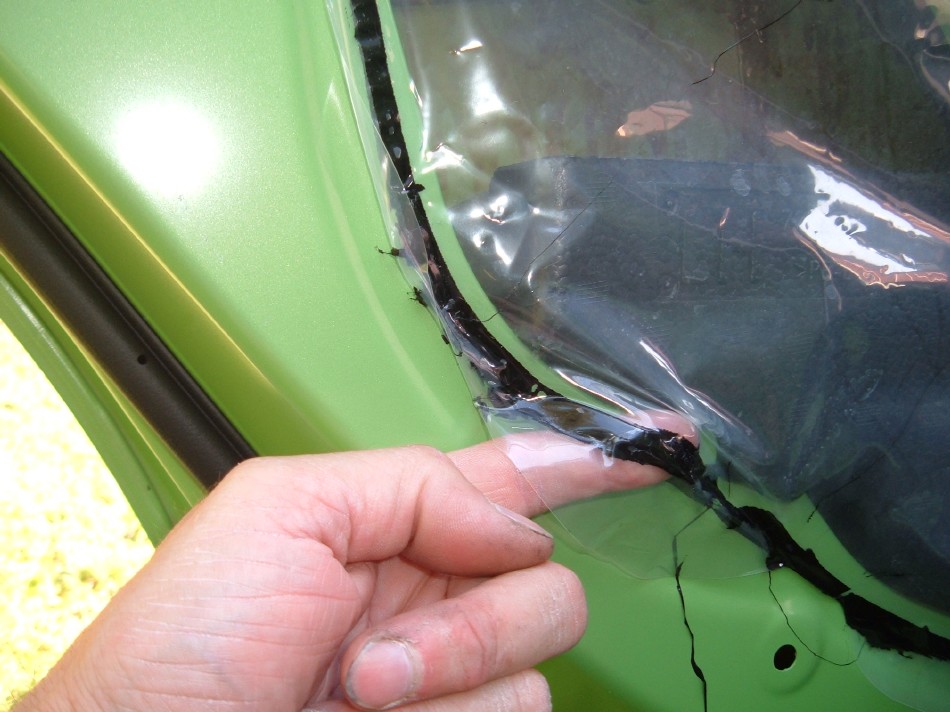
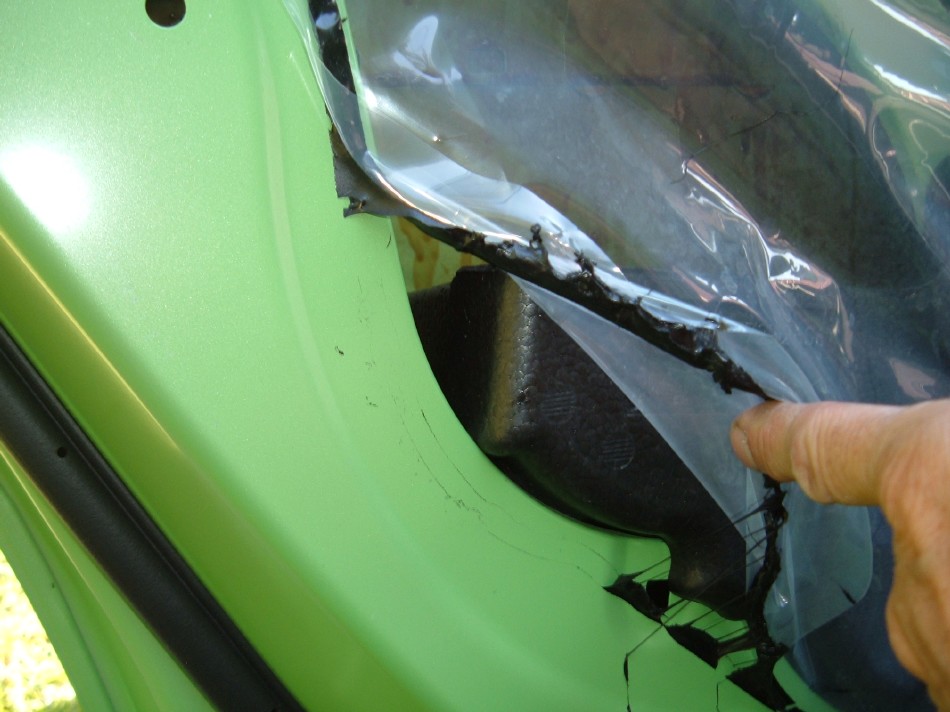
The adhesive that holds the plastic liner in place is very pliable. It's basically urethane rope seal and I have about 35 pounds of the stuff strategically holding parts of Centurion together! There is a trick to saving the plastic liner though. Using your finger as though it were a knife, get behind the plastic and pry up the black sealer:
.
.
.
.
.
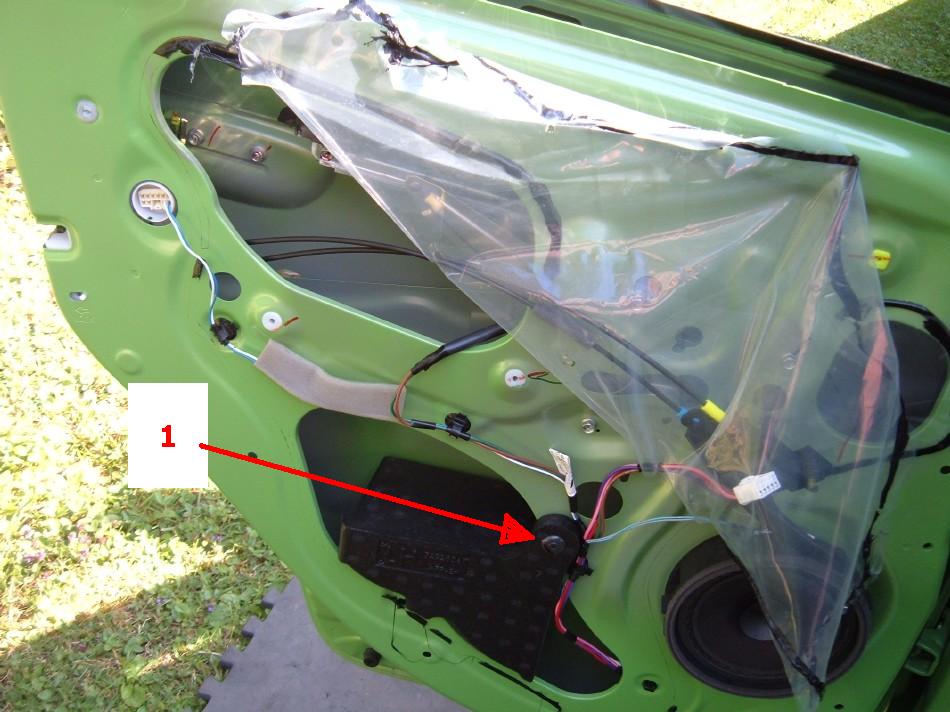
There should be plenty of adhesive so you can "stick" the plastic out of the way and this will give you access to remove a styrofoam block of sorts (probably aids in an impact situation - just guessing though..) There is one plastic phillips screw that expands a plastic rivet that holds this thing in place. Remove that screw and out it comes!!
.
.
.
With the block removed you get a real good look at the inner door and a support beam. Notice, though, all the nooks and crannies where dirt and water can accumulate and ultimately rot out your doors!
..
.
.
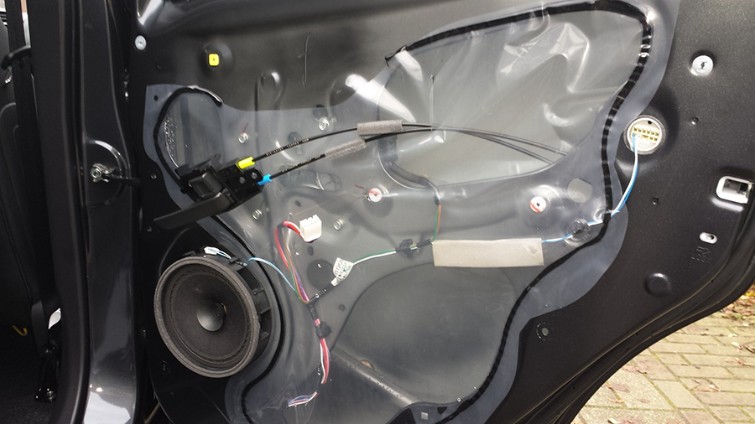
**UPDATE 12-20-2014**
The 2015 Mirage doesn't have this styrofoam block in the rear doors. Thanks again to ToXIQ for this update. (My 2014 Mirage has 6,100 miles on it now but ToXIQ's info is making it obsolete already! Haha!) Pic below:
.
.
.
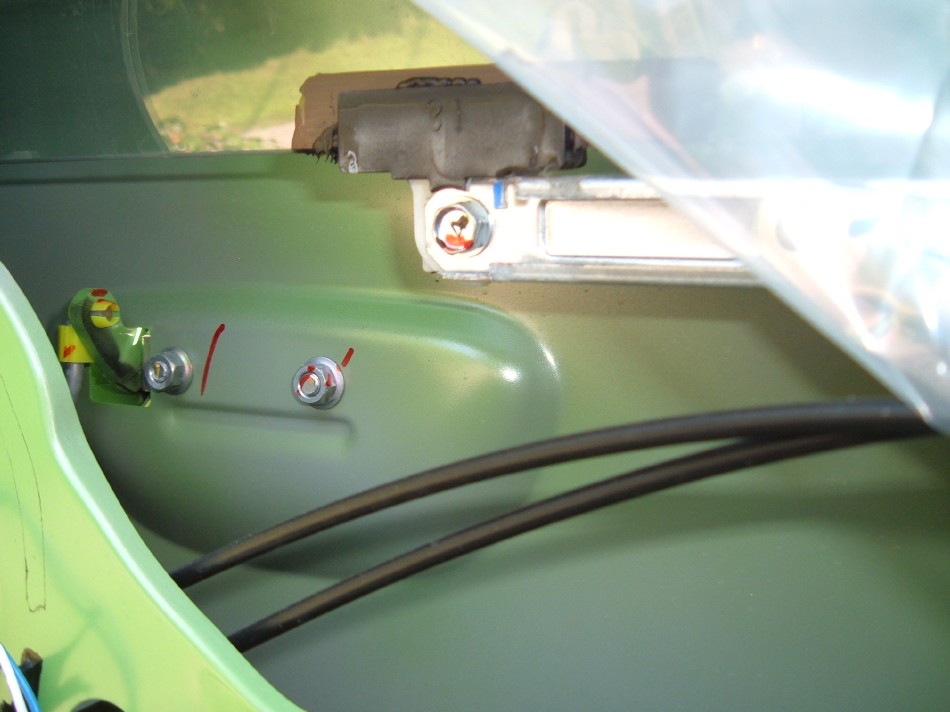
Looking upward, we see the two nuts that hold on the exterior door handle. In time, they too will rust where they meet the door. Notice also, the window regulator track and how the glass is attached..:
.
.
.
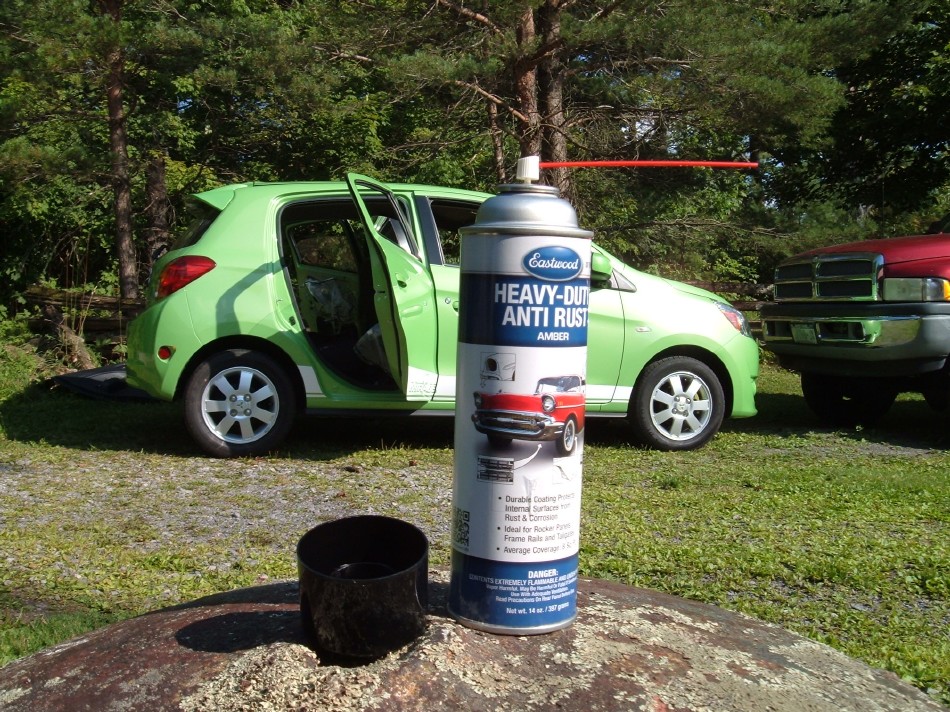
Ok, talk is cheap, let's get down to business! For this task, the black undercoating we previously used won't cut it. We need something that will find all those nooks and crannies and remain pliable over time. There is such an undercoating and generically it's called "Amber Undercoating". This used to be popular in rattle cans at every local auto parts store but this does not appear to be the case anymore - what happened? So I found some online:
.
.
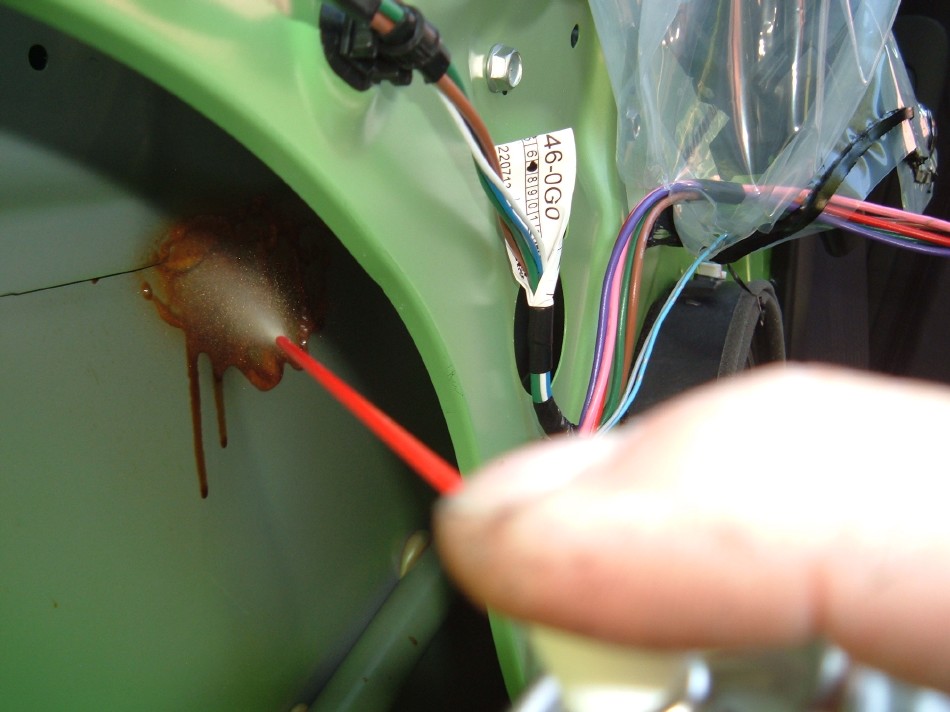
Even the most spirited user should find one can should easily be enough for both rear doors. Shake the can well, insert the little straw into the nozzle and commence to spraying. Go from top to bottom and don't be worried if it "runs" - that's exactly what you want!
.
.
.
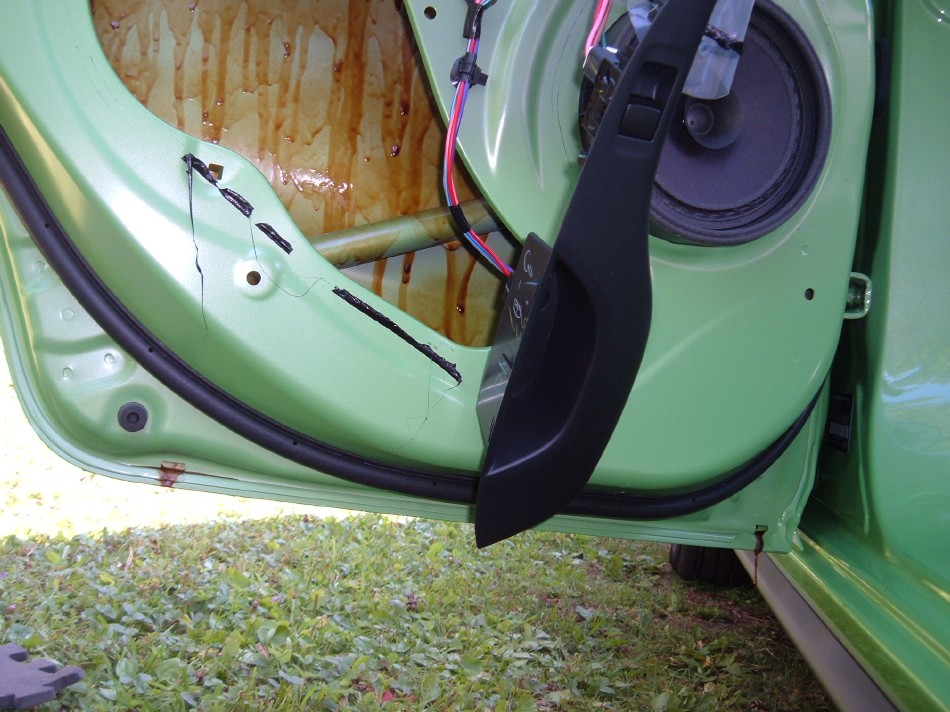
At some point it will stop running and firm up. Areas that didn't get covered will show up - blast'em!
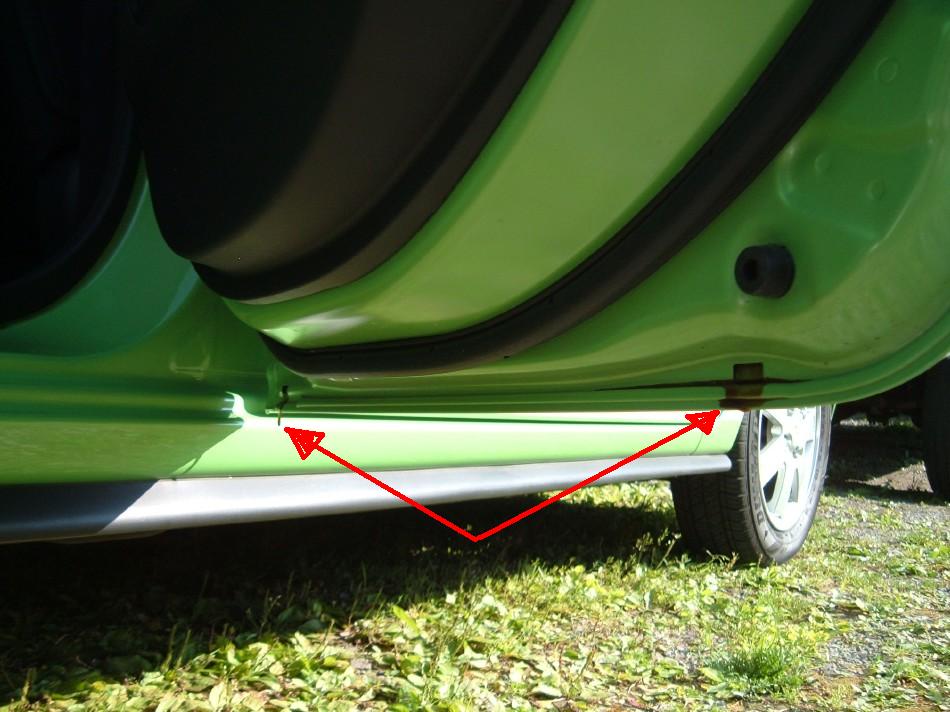
Notice how the undercoating ran along the inside of the pinch weld and found the drain holes:
.
.
.
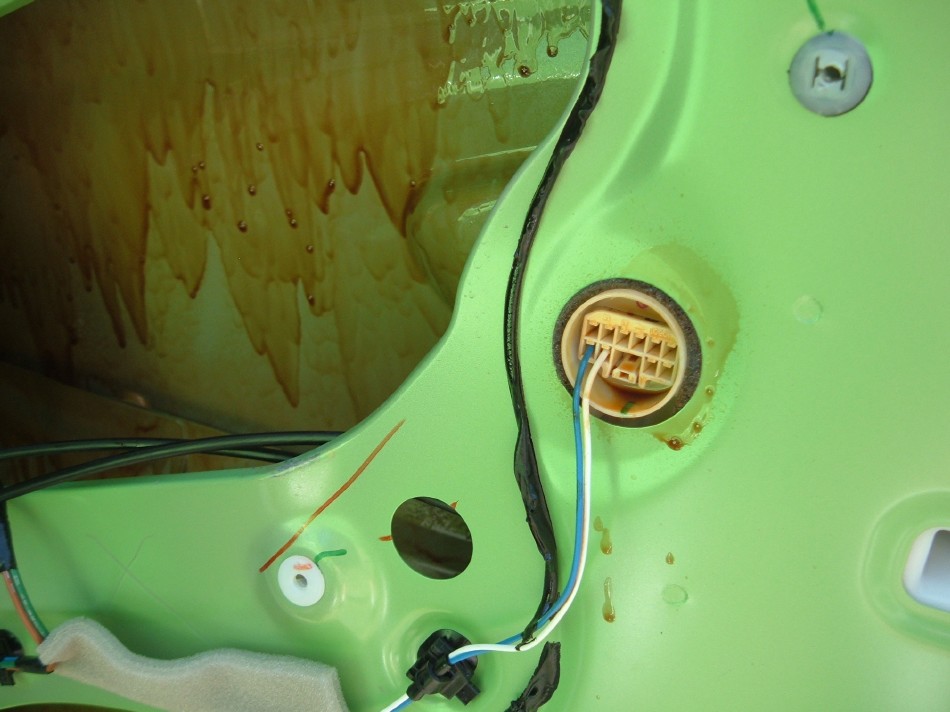
If your Mirage has electric windows you may see the connector and the exposed crimps.. This undercoating works excellent in preventing corrosion in these!
.
.
.
.
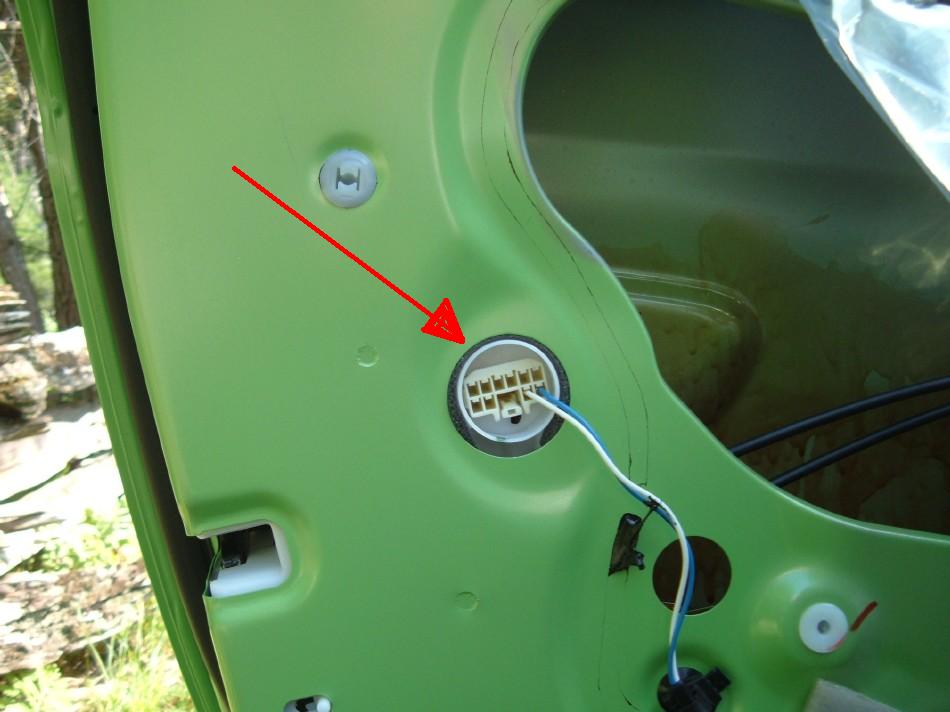
The speaker connector looked like it could be a place for dirt and moisture to hide. Not anymore:
.
.
.
When you're done spraying, simply reverse the procedure to reassemble and you're done - well almost!
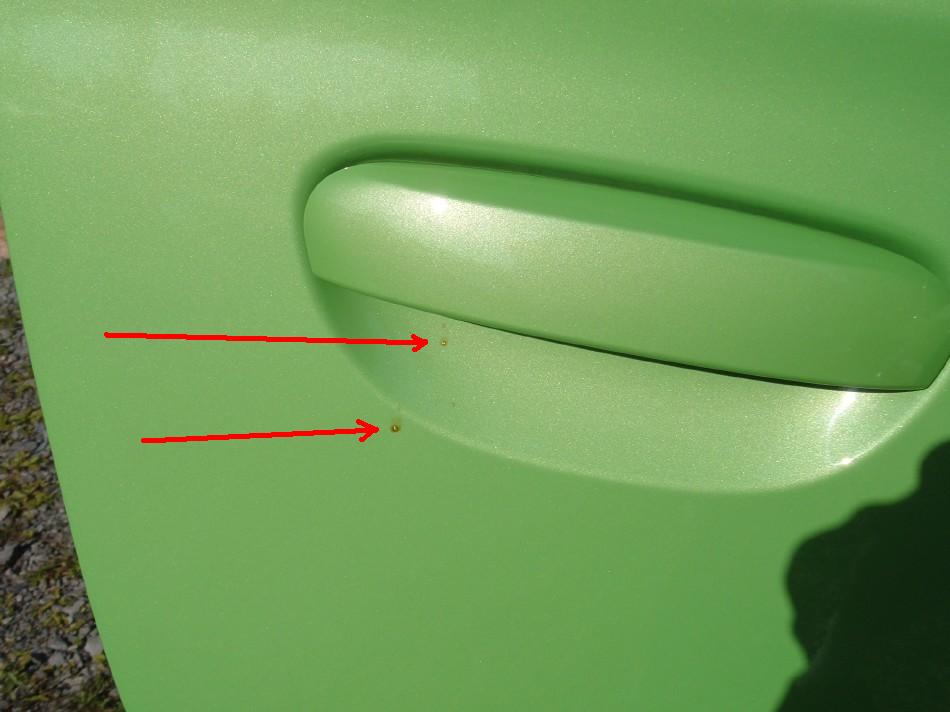
If you see any areas where the undercoat dripped out, you may wish to wipe with a paper towel. Some escaped around the outer door handle and also through the bottom drain holes:
.
.
.
.
.
.
~CrazyJerry
P.S. Continuing to Work hard for a free window forum sticker!
Last edited by CrazyJerry; 01-21-2019 at 10:23 PM.
Reason: Add photo for screw deletion on 2015 Mirage


")


 Reply With Quote