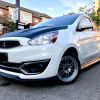
-ez lip on the side and front bumper
https://www.ezlip.com/product/ez-lip-pro/
-Carbon Hood wrap and gas cover.
https://www.amazon.ca/gp/product/B00L9J4L6A/ref=oh_aui_detailpage_o04_s00?ie=UTF8&psc=1
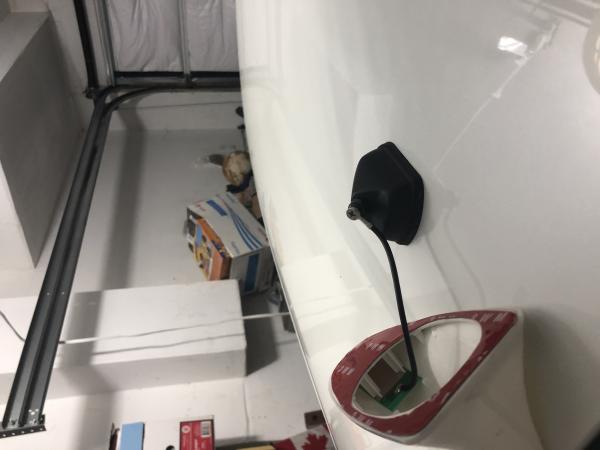
-Shark fin antenna installed
https://www.ebay.ca/itm/White-Auto-Car-Exterior-Roof-Shark-Fin-AM-FM-Radio-RV-Signal-Aerial-Antenna/153056237463?hash=item23a2dcd797:g:j1EAAOSwnTpbHE3 h
-Vvivid 5% tints and 25% tints high quality, Made in Canada: https://www.ebay.ca/sch/instawraps/m.html?_nkw=&_armrs=1&_ipg=&_from=
Thanks. Before purchasing, I was also looking at Green-Lite Lithium battery from Braille particularly the G20 model and also the AntiGravity brand, model group 35 and the ATX30-HD.
I picked this one because Lifepo4 is safer, it has a BMS built. I had an lifepo4 on my ebike that lasted 8 years, so the lifespan is excellent on than SLA. Also this model is the lowest weight, with excellent CCA rating.
There is also other models from EarthX that may suit your requirements, higher CCA, AH, lower weight & etc.
+pros
-Cons
Braille G20
+Slightly cheaper than the ETX900
+They claim that it is safe without the BMS and no issues from customers according to Sales.
-No BMS
-Low PCA
-No CCA rating published
-It has the least capacity compared to the 3.
ATX30-HD
+ High cranking Amps, & Capacity/weight ratio
+BMS built in
-Lithium chemistry
-It is Back order
-Max charge rate is small printed on the battery at left corner main photo (12Amps max)
Our alternator is 70-80A peak.
-CCA rating not published
Anti gravity Group 35
+Same or close to stock capacity and Highest Cranking amps.
+Auto start Re-Start built in feature
+Same as OEM fitment
+Least cost $/AH
-No CCA rating published
-Most expensive
-Not so significant weight savings
-Out of my budget
ETX900
+Safer than lithium
+Have the least weight
+Longer lifespan than Lithium
+There is a BMS built in
-High PCA
+CCA rating is published and detailed specifications so I know what I am getting.
+Newly manufactured the fresh battery, but 1 week lead time prior to shipping.
-Lower AH compared to the two.
-Costs most $ per AH
I see that CVT fluid is rated for Mitsubishi. I think Fummins uses universal cvt too for his Mirage fleet. I recommend OEM too, its what I use. It really smooths the whole operation out for the next year or so IMO.
1. Throttle body/intake runners cleaning
There was gunk build up in the throttle body. Use carb cleaner and put the car in start-Accessory mode. place a rod against the car seat to the gas pedal or use a brick si that the throttle opens Wide for easier clean up. Use a toothbrush and spray it with carb cleaner.
2. Intake valves inspection for cleaning. Very clean Not needed. Used Gumout/techron from time to time.
Follow this to remove intake manifold. There was some oil film on the intake inlet on the block, I just wipe it off. Valves were very clean too. From time to time I used Gumout or techron which might have kept it this clean. https://youtu.be/K8ZLW4YJXtA 3. PCV valve cleaning
Sprayed with carb cleaner since it felt like there was stiction when I shook it. When its clean, you should hear a clicking sound when you shake it. 4. Porting and polishing throttle body
Very noticeable after this mod. I have not done a 0-60 run yet but it felt it gained some HP. 5. Injectors cleaning
I just cleaned the body and sprayed the heads with sensor cleaner 6. Polyurethane End Links
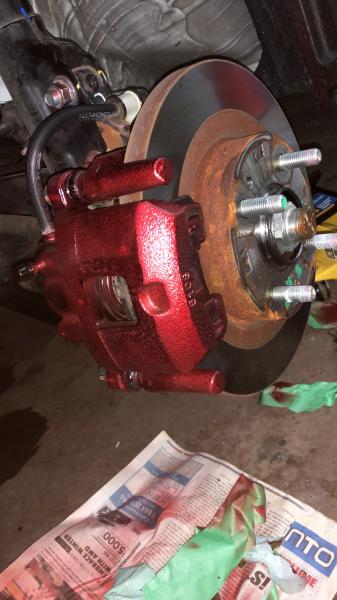
Handling is much better after this mod. Felt more flatter and the steering is more sensitive. Perfect combination with the poly sway bar bushings. I used part # prothane 19420. The Bolt is too short and it didn't come with the spacer. I am reusing the OEM bolt, spacer/sleeve and the cup for the lower control arm 7. CV Boot Cracked.
Unexpected surprise spotted while working on the end links. Seems like it spitted a lot of grease. Temporary fix with flex seal, and plentiful of facemask cloth. Glad that I spotted it early before it becomes a major issue.
171,000 km Eco mods: Grill block and belly pan/engine under tray
Since gas prices are getting costly, I decided to put a grill block and underbody tray.
Grill Block
For the grill block, replace the stock grill with an aluminum mesh, and you can cover it with any material you like. For me I used a synthetic leather. Apply duct tape on lower grills or use a plastic sheet or, foam (piping insulation) & zip ties.
Front Underbody tray
Heres the best dimensions To get the best coverage that would not interfere with the lower control arm and get too close to the catalytic converter.
Trimmed size: 38x39
Use a corrugated plastic sheet for lowest cost, easier installation/trimming and flexibility. Plexiglass/acrylic works too and more durable but theyre 2-3x more expensive, and harder to work on. Remove the black under tray attached behind the bumper. Remove screws/clips underneath the bumper. Insert the corrugated plastic so that the sheet would align to the clips/screws insert of the bumper. Use the bumper mounting points of the clips/screws and punch a screw driver or sharp object to puncture the plastic sheet. Take the black under tray that you took out and use it as your guide where you would punch the holes on the sheet, place it back where it was. Reuse the clips. Under the wheel wells, there are a couple of holes where you can punch and insert the clips. For the rear mounting pints of the sub tray, use the subframe and insert a couple of long zip ties in there. It gets a little tricky where to punch the sheet.
Results:4.2-5 L/100km highway
Retains heat from coolant, engine, transmission much longer when parked which also saves gas if car needs to be driven after. Best results especially in winter.
Previous fuel economy without the mods on winter 6-7L/100km


 My First car


 Reply With Quote

 Ninja Turtle
 the snowball