Page 2 of 5 FirstFirst 1234 ... LastLast
Results 11 to 20 of 47

Thread: Works Aluminum Crankshaft Pulley

  1. #11
    Still Plays With Cars Loren's Avatar
    Join Date
    May 2018
    Location
    Florida
    Country
    United States
    Posts
    1,225
    Thanks
    324
    Thanked 936 Times in 539 Posts
    DHL delivered my pulley today. I've got all sorts of time to install it this week, but I can't promise that I'll have the motivation. It's been stupid hot lately, pretty easy to find excuses to not go out to the garage! Plus, I need to do some acceleration runs before I install it to get a current baseline before installing it. I have an autocross this Sunday, so I would kinda like to have it installed before then.

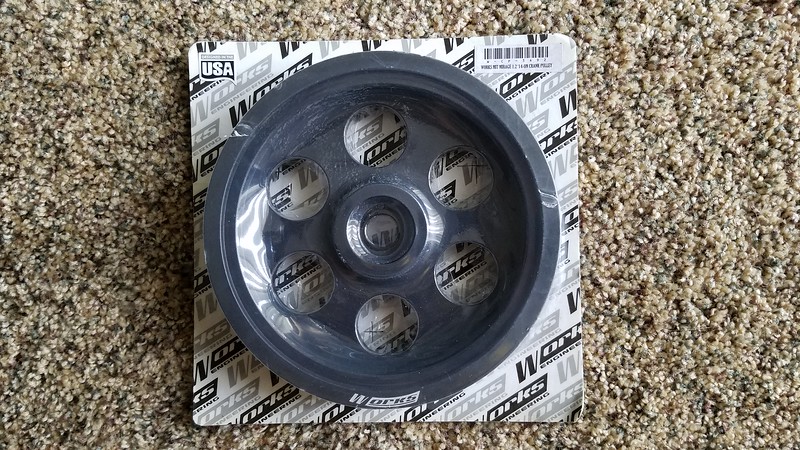
    I was expecting a "hot off the CNC mill" bare aluminum pulley, and I'd have been fine with that. (had an OBX pulley on a Miata many moons ago that was just that, no problem) This doesn't look like that at all. It's a nicely made part, and it's powder coated black. Packaged nicely from the manufacturer. And packaged nicely from the seller. Better than expected so far!

    I haven't removed my stock pulley yet. Will weigh it and do side-by-side photos when I do. But, the weight of the stock pulley has been documented by Doax as 2.80 lbs. My digital kitchen scale has this one at 1 lb 0.3 oz, or 1.02 lbs. A reasonable reduction in rotating mass.


    More photos here


    Simplify and add lightness.

  2. The Following User Says Thank You to Loren For This Useful Post:

    MetroMPG (09-18-2018)

  3. #12
    Still Plays With Cars Loren's Avatar
    Join Date
    May 2018
    Location
    Florida
    Country
    United States
    Posts
    1,225
    Thanks
    324
    Thanked 936 Times in 539 Posts
    I don't know why I didn't try to research this before. But, I didn't need to order this from Malaysia. It's available direct from Works Engineering, right on their website. At a slightly better price (couple bucks), and with likely cheaper shipping due to not crossing an ocean. https://www.worksengineering.co/prod...pro-balancing-
    Simplify and add lightness.

  4. The Following 3 Users Say Thank You to Loren For This Useful Post:

    Daox (09-19-2018),Marklovski (09-18-2018),MetroMPG (09-18-2018)

  5. #13
    Senior Member
    Join Date
    Sep 2015
    Location
    Rochester, NY
    Country
    United States
    Posts
    174
    Garage empty: add car
    Thanks
    106
    Thanked 38 Times in 28 Posts
    I look forward to your installation and driving impressions. I might give it a try, if it's not too difficult.

  6. #14
    Still Plays With Cars Loren's Avatar
    Join Date
    May 2018
    Location
    Florida
    Country
    United States
    Posts
    1,225
    Thanks
    324
    Thanked 936 Times in 539 Posts
    Aside from removing the belt, it should be a 1-bolt operation. The factory manual lists a special tool to hold the pulley while loosening and torquing the bolt. I expect I'll be wedging a pry bar through one of the holes.

    Anyway, should be quick and easy, unless it's just hard to get to. I really haven't looked at it yet!
    Simplify and add lightness.

  7. #15
    Senior Member
    Join Date
    Jun 2018
    Location
    Willowick, Ohio
    Country
    United States
    Posts
    105
    Thanks
    9
    Thanked 36 Times in 21 Posts
    Idk why but the actual website from Works says my address is out of zone, which doesn't make a lot of sense

        __________________________________________

        click to view fuel log View my fuel log 2017 Mirage ES 1.2 manual: 37.4 mpg (US) ... 15.9 km/L ... 6.3 L/100 km ... 44.9 mpg (Imp)


  8. #16
    Still Plays With Cars Loren's Avatar
    Join Date
    May 2018
    Location
    Florida
    Country
    United States
    Posts
    1,225
    Thanks
    324
    Thanked 936 Times in 539 Posts
    Hmmm... Call or email them?
    Simplify and add lightness.

  9. #17
    Still Plays With Cars Loren's Avatar
    Join Date
    May 2018
    Location
    Florida
    Country
    United States
    Posts
    1,225
    Thanks
    324
    Thanked 936 Times in 539 Posts
    Baseline acceleration testing is done!

    Will try to get this installed tomorrow, and then do another round of testing.

    I'm pretty stoked. All of the little mods I've done so far have improved my 2nd gear acceleration by 7.5%. Stuff like the crank pulley will be most effective in lower gears. 1st and 2nd for sure, also a bit in 3rd.

    I'm using 2nd gear acceleration as my test (1500-6000 rpm), and I'm down from 8.8 seconds to just over 8.1 seconds. If this gets me down to 8.0, I'll be happy. That would be another 1.5%. Not sure if the crank pulley will do that much or not. Eager to find out.
    Simplify and add lightness.

  10. The Following 2 Users Say Thank You to Loren For This Useful Post:

    Angrybeaver (09-19-2018),Daox (09-19-2018)

  11. #18
    Senior Member
    Join Date
    Sep 2015
    Location
    Rochester, NY
    Country
    United States
    Posts
    174
    Garage empty: add car
    Thanks
    106
    Thanked 38 Times in 28 Posts
    Quote Originally Posted by Loren View Post
    Aside from removing the belt, it should be a 1-bolt operation. The factory manual lists a special tool to hold the pulley while loosening and torquing the bolt. I expect I'll be wedging a pry bar through one of the holes.

    Anyway, should be quick and easy, unless it's just hard to get to. I really haven't looked at it yet!
    I read that excerpt from the manual, and it made it sound pretty labor intensive. I've only done crankshaft pulleys on Subarus, and that's a one bolt affair. Plus jamming a screwdriver in the flywheel on the automatics!

  12. #19
    Still Plays With Cars Loren's Avatar
    Join Date
    May 2018
    Location
    Florida
    Country
    United States
    Posts
    1,225
    Thanks
    324
    Thanked 936 Times in 539 Posts
    Pretty simple task, but...

    I'm only about an hour in. The pulley is swapped, I just have to put the belt back on button things up. Should be 30 minutes or so once I get back out there.

    The "but" is that the bolt is REALLY tight. My electric impact wouldn't budge it. My air impact wouldn't budge it! With the engine block and everything behind the pulley being aluminum, I didn't want to just wedge a pry bar through the pulley and risk breaking something. So, I took some scrap steel and welded up a quick pulley-holding tool. Once I had the pulley securely held, I went after it with my 2-foot breaker bar. Even then, I had to brace my feet and REALLY pull on it to break it free.

    On assembly, the initial torque of 36 ft-lbs is merely a "breath". It's just enough to make contact. Then you tighten it another 1/6 turn. The first 1/12 was easy enough. To get it to a full 1/6 turn, I had to again brace myself and push on the breaker bar with my foot!

    So, yeah, you're going to need a tool to hold the pulley, and plenty of leverage to get it loose and properly torqued.

    Side note: Man, there were times (even in the not-too-distant past) that something like this would have stifled me! Having the experience to know "I don't want to break that, let's not get impatient and try to do it that way". And having a reasonably well-equipped garage with enough crap laying around, an angle grinder and a cheap-ass stick welder made quick work of creating the required tool. In the end, I'll have this job done in 90 minutes INCLUDING making a special tool, and I never had to leave the house!

    I'll have photos later.
    Simplify and add lightness.

  13. The Following User Says Thank You to Loren For This Useful Post:

    inuvik (09-19-2018)

  14. #20
    Senior Member stevedmc's Avatar
    Join Date
    Dec 2015
    Location
    Baton Rouge
    Country
    United States
    Posts
    758
    Thanks
    7
    Thanked 288 Times in 193 Posts
    Quote Originally Posted by Loren View Post
    So, yeah, you're going to need a tool to hold the pulley, and plenty of leverage to get it loose and properly torqued.
    I feel your pain. The first time I ever removed a crankshaft nut, I ended up having to use a 5 foot cheater pipe and I destroyed the pulley in the process.

    This was after driving around and nicely asking several shops to try removing that nut with their impacts. No one's impact wrench was strong enough, hence me having to use a 5 foot cheater pipe.

    Good times.


Posting Permissions

  • You may not post new threads
  • You may not post replies
  • You may not post attachments
  • You may not edit your posts
  •