


 Underdog
Well, here's a section of the forum that I don't spend much time in!
Project: Rear Seat Removal
Goals: Remove as much (simple bolt-on) weight as possible while retaining full interior, and creating some sort of removable platform/mat to make the space usable and insulate noise from the rear suspension, exhaust, etc.
Motivation: I compete in autocross with this car quite regularly. Weight is king. Removing the rear seat (along with other weight reduction that I've done) gets my total weight below 1900 pounds. (woohoo!)
I started by searching the forum for info on how to remove the seat. Pretty straightforward, all you need is 14mm socket. Comes right out.
That was so easy, that I figured I might as well take the seat belt reels out. And the seat back latching posts were right there, so I removed those, too. The only tools required for all of this were 14mm and 12mm sockets, and something to pull a handful of plastic clips with.
To remove the plastic panels, first pop the center piece at the back hatch. It just snaps in place, comes out easily enough. Then pull the four push pins on the bottom side panel on each side. These aren't the standard pronged push-pins like you'll find on places like the bumper. They have a ball on the end and snap into a special receptacle. You'll need a tool that can get under the head on both sides (I used a pair of curved needle nose pliers) and then they'll pop right out. From there, just gently pry the panel away from the body, it'll snap out of its clips. Don't forget to unplug the interior light on the left side. The upper panel is much the same. Pull the two bottom clips out first, then just start pulling it away and out of the rest of the clips. It all snaps together like Legos when you're done. (if you ever worked on cars in the 70's and 80's, you'll be amazed out how easy it all comes apart and goes back together, it's all very well-engineered)
With the panels out, removing the seatbelt reels was easy. Two 14mm bolts. And the seat back latching posts are held in with three 12mm bolts. I could have gotten crazy and removed the rear window washer tubing (rear wiper was removed long ago!) and the gas filler release cable and maybe some wiring... but, I decided to stop with the simple bolt-on stuff!
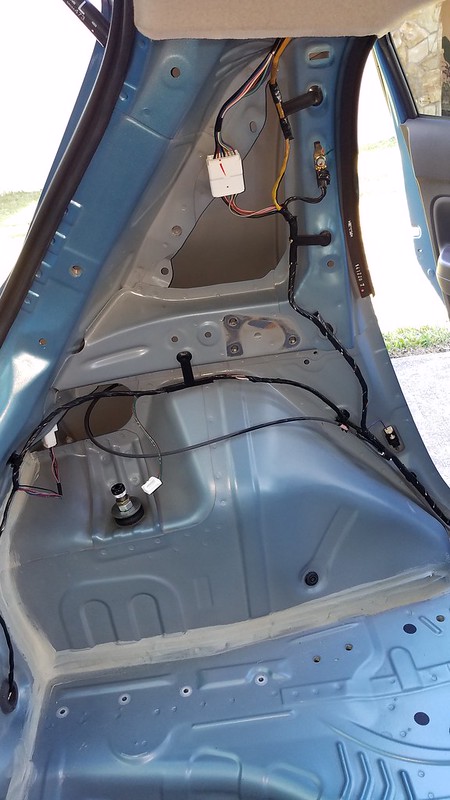
There are photos elsewhere of what's under the seat, and that's all pretty easy to get to. (just pull up on the seat bottom, it comes right out) But, while I had the interior side panels out, I thought I'd take some reference photos:
Left Side:
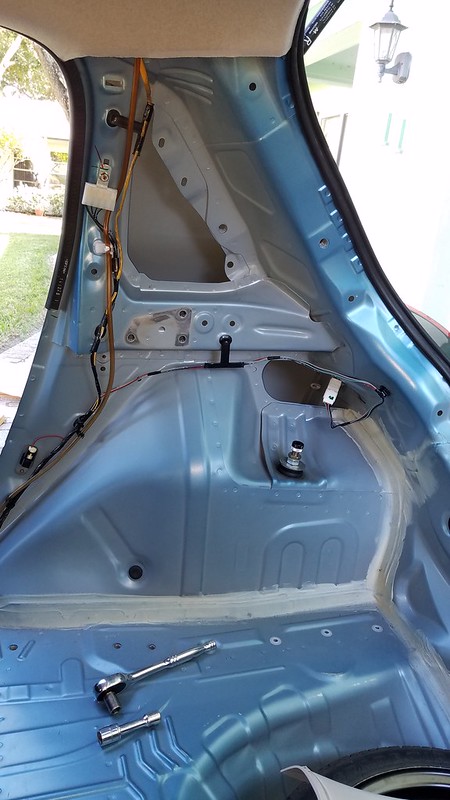
Right Side:
Now, I've got a friend who is in the flooring business and used to do carpeting in custom vans, so he did all the work here. I just helped make decisions, and took a couple photos. Pretty darned easy, really. But, easier if you have a pneumatic stapler to tack everything together with!
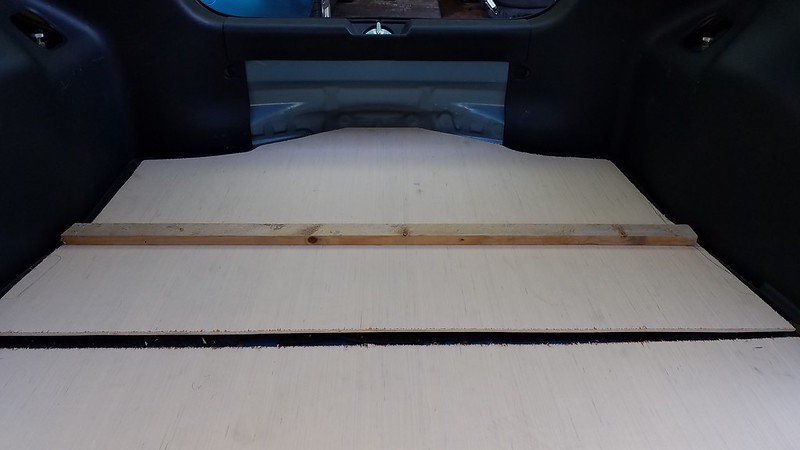
The platform is made from 1/4" plywood of some sort. (he had a name for it, I don't remember) With 1x2 as the supporting "lumber". It's made in two pieces. I have some additional mounting/finishing to do. The intent is for the front piece to snap into the rear seat bottom mounting points. It will be easy enough to create brackets to snap into those just like the seat does. That will be enough to keep that in place so that it doesn't slide around, and still be very easy to remove if I want to. (it only weighs 2-3 pounds, I may just leave that part in)
The rear piece is mostly the same as the piece of carpet that covers the spare tire well. It's cut to fit in there snugly. It is unsecured, but can't slide forward because it is wedged against the front piece. I also keep a heavy bin of tools and stuff on it, which keeps it weighted down.
We put a 1.5" lip on the front edge of the front piece to catch any boxes or other crap that I might pile in the back. And a 0.75" lip on the rear piece to catch the front of my bin that normally rides back there. I may need to add something to keep said bin from sliding side-to-side.
Here are a couple shots of the framework. It's rough, not perfect, but it's all getting covered with carpet, anyway.
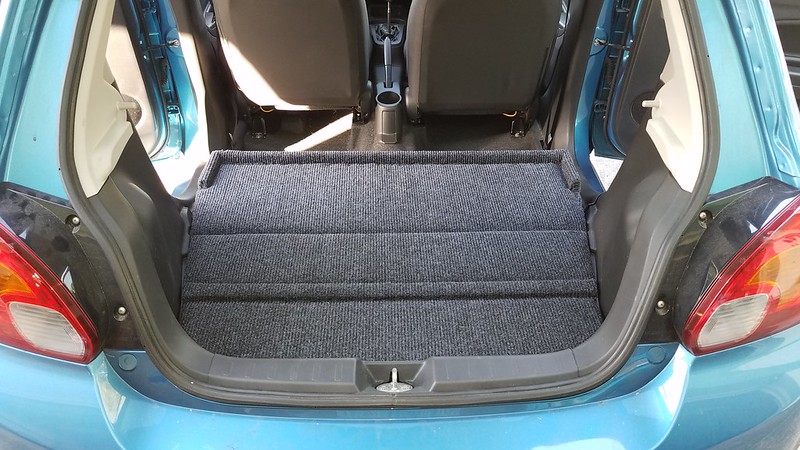
Once it was all roughed in, we covered it with 1/2" carpet padding and some nice lightweight carpet.
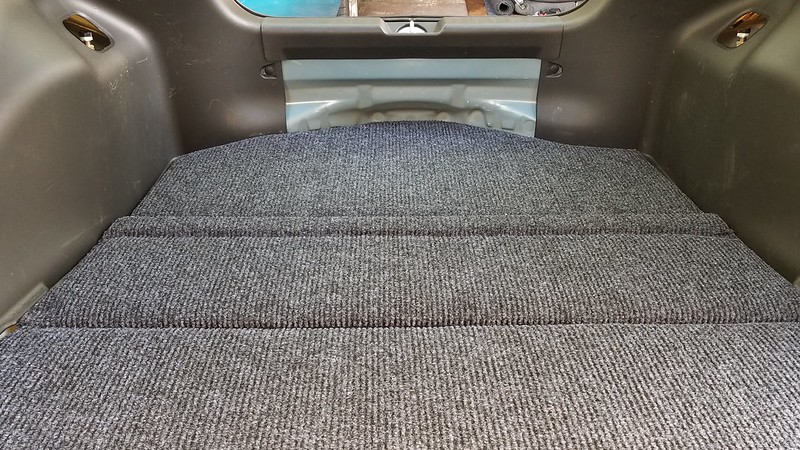
Now it looks a little something like this:
In addition to the foam padding under the carpet, there's another layer of foam under the rear section that goes over the spare tire. With the tight fit of the rear section all the way to the back of the cargo area, 1/4" of wood, and plenty of foam and carpet, the noise has been abated quite nicely!
The rear section can easily be lifted up at the front, slid forward and pulled out the hatch to gain access to the spare tire. That will all come out for competition, and it will take about 90 seconds to do! Super-easy to put back in, as well.
I have every part that was removed in the middle of my garage floor right now. I'll be weighing everything and trying to keep the parts together should I ever decide to reinstall the rear seat. Will post weights probably tomorrow.


 Reply With Quote